
Point at a compliant subject and use the arrest command to zip-tie them. Shout at people first to get them to comply, then restrain them while they are on the ground. This will pop in your very first real mission.
This is a cumulative counter across every mission and game mode, so it ticks up naturally as you play. To speed it up, favour missions with a large civilian population and restrain everyone you clear rather than leaving them lying on the floor — restraining them also helps your mission score.
The same cumulative counter as Arrest Warrant, just double. Nothing to do differently: keep restraining every person you get to comply. If you are grinding it, replay a densely populated map you know well and cuff every subject you find before finishing the objectives.

The Mirrorgun is the under-door mirror in your tactical gear slots. Equip it in your loadout, walk up to any closed door and use it to peek underneath. The counter is cumulative across missions and it does not care whether anyone is on the other side, so you can farm it on doors you have already cleared. It is also genuinely useful: mirroring before you breach is how you avoid walking into a shotgun.

Some suspects who go down are not actually out of the fight. Approach a downed suspect and arrest them — if that particular subject was faking, the achievement fires. There is no way to tell in advance which one it will be, so make a habit of restraining every downed body you pass instead of walking by. That is good practice anyway, since restraining and reporting bodies feeds your score.
Complete Thank You, Come Again, Rust Belt, Twisted Nerve at rank C+ or better on Standard difficulty or higher (Easy will not count). The missions can be played in any order and in any game mode. Ranks in Ready or Not come from your post-mission score: completing every objective, keeping civilians and your own officers alive, arresting subjects instead of shooting them, and reporting each downed or restrained person and each piece of collected evidence to TOC. C+ is a forgiving bar — finish the objectives cleanly and report everything and you should clear it.

Face a door, open the squad command menu and give a breach order rather than opening the door yourself. Any breach method your officers use counts, and the counter is cumulative across missions. Playing with AI officers and letting them lead every entry will get you there without going out of your way.

Complete The Spider, Valley of the Dolls, Sinuous Trail, 23 Megabytes a Second at rank C+ or better on Standard difficulty or higher (Easy will not count). The missions can be played in any order and in any game mode. Ranks in Ready or Not come from your post-mission score: completing every objective, keeping civilians and your own officers alive, arresting subjects instead of shooting them, and reporting each downed or restrained person and each piece of collected evidence to TOC. C+ is a forgiving bar — finish the objectives cleanly and report everything and you should clear it.
The same cumulative counter as Walnut Warrior, extended. Keep giving your officers the breach order on every door instead of opening it yourself — it is slower than doing it manually but far safer, so this one tends to unlock on its own if you play methodically.

Some maps are wired with traps. When you spot a tripwire, approach it and use the disarm interaction rather than walking through it or shooting it. Bring a flashlight or use your weapon light in dark interiors — the wires are easy to miss at a jog, which is exactly how people trigger them. The counter is cumulative, so replaying trap-heavy maps is the fastest route.
Select Training from the mission list and play it through to the end. It is the tutorial scenario, there is no rank requirement, and it doubles as a safe place to practise your squad commands and door tools.

Complete Carriers of the Vine, Sins of the Father, Ides of March, A Lethal Obsession at rank C+ or better on Standard difficulty or higher (Easy will not count). The missions can be played in any order and in any game mode. Ranks in Ready or Not come from your post-mission score: completing every objective, keeping civilians and your own officers alive, arresting subjects instead of shooting them, and reporting each downed or restrained person and each piece of collected evidence to TOC. C+ is a forgiving bar — finish the objectives cleanly and report everything and you should clear it.

Complete Buy Cheap, Buy Twice, Hide and Seek, Ends of the Earth, Greased Palms at rank C+ or better on Standard difficulty or higher (Easy will not count). The missions can be played in any order and in any game mode. Ranks in Ready or Not come from your post-mission score: completing every objective, keeping civilians and your own officers alive, arresting subjects instead of shooting them, and reporting each downed or restrained person and each piece of collected evidence to TOC. C+ is a forgiving bar — finish the objectives cleanly and report everything and you should clear it.
Take the Lockpick Gun in a tactical gear slot, walk up to a locked door and use it instead of the battering ram or a C2 charge. Only locked doors count, so look for interior offices, storerooms and back entrances. The counter is cumulative and picking is the quiet option, which is often what you want anyway.

Complete Elephant, Relapse, Neon Tomb at rank C+ or better on Standard difficulty or higher (Easy will not count). The missions can be played in any order and in any game mode. Ranks in Ready or Not come from your post-mission score: completing every objective, keeping civilians and your own officers alive, arresting subjects instead of shooting them, and reporting each downed or restrained person and each piece of collected evidence to TOC. C+ is a forgiving bar — finish the objectives cleanly and report everything and you should clear it.
Equip the Battering Ram and use it on locked doors — unlocked doors will not count toward the 20. It is loud, so expect contact immediately after; stack up and have your squad ready to flow in. Cumulative across missions, so mix it with the Lockpick Gun runs on different doors.
Complete Narcos at rank C+ or better on Standard difficulty or higher (Easy will not count). The missions can be played in any order and in any game mode. Ranks in Ready or Not come from your post-mission score: completing every objective, keeping civilians and your own officers alive, arresting subjects instead of shooting them, and reporting each downed or restrained person and each piece of collected evidence to TOC. C+ is a forgiving bar — finish the objectives cleanly and report everything and you should clear it.
Take an M320 loaded with a less-lethal option in your loadout and fire it at suspects so the blast stuns them. Only stunned enemies count toward the 30, and the counter is cumulative, so it takes several missions. Suspects grouped in a room are the efficient target; bounce the round into the space rather than trying for a direct hit on one person.

Complete Lawmaker at rank C+ or better on Standard difficulty or higher (Easy will not count). The missions can be played in any order and in any game mode. Ranks in Ready or Not come from your post-mission score: completing every objective, keeping civilians and your own officers alive, arresting subjects instead of shooting them, and reporting each downed or restrained person and each piece of collected evidence to TOC. C+ is a forgiving bar — finish the objectives cleanly and report everything and you should clear it.
You may use deployables, tactical gear and melee bashing only — no firearms at all, including less-lethal guns. Practically that means going in heavy on flashbangs, CS gas, stingers and the taser-free tools you can carry, then bashing anyone who does not comply. Your AI officers can still carry weapons, so a small, low-population map you know well is the sensible pick, and you can command your squad to do the heavy lifting while you stay behind cover. Standard difficulty or higher is required.
This achievement is hidden and Steam does not publish a description for it, so we are not going to guess the trigger. Rather than invent a requirement, we recommend checking a community guide or adding a tip below if you unlock it — we would rather leave a gap than give you wrong information.

Complete Dorms at rank C+ or better on Standard difficulty or higher (Easy will not count). The missions can be played in any order and in any game mode. Ranks in Ready or Not come from your post-mission score: completing every objective, keeping civilians and your own officers alive, arresting subjects instead of shooting them, and reporting each downed or restrained person and each piece of collected evidence to TOC. C+ is a forgiving bar — finish the objectives cleanly and report everything and you should clear it. Dorms is a compact map and a good first pick if you are working through the C+ list.

Complete Leviathan at rank C+ or better on Standard difficulty or higher (Easy will not count). The missions can be played in any order and in any game mode. Ranks in Ready or Not come from your post-mission score: completing every objective, keeping civilians and your own officers alive, arresting subjects instead of shooting them, and reporting each downed or restrained person and each piece of collected evidence to TOC. C+ is a forgiving bar — finish the objectives cleanly and report everything and you should clear it.

Place a C2 charge on a door with a suspect standing close on the other side and detonate it — the blast has to be what puts them down. Use the under-door mirror or an optiwand first to confirm someone is standing right against the door, then set the charge and blow it. Expect several attempts, since suspects rarely park themselves exactly where you need them.

Complete Mirage at Sea at rank C+ or better on Standard difficulty or higher (Easy will not count). The missions can be played in any order and in any game mode. Ranks in Ready or Not come from your post-mission score: completing every objective, keeping civilians and your own officers alive, arresting subjects instead of shooting them, and reporting each downed or restrained person and each piece of collected evidence to TOC. C+ is a forgiving bar — finish the objectives cleanly and report everything and you should clear it.

This achievement is hidden and Steam does not publish a description for it, so we are not going to guess the trigger. Rather than invent a requirement, we recommend checking a community guide or adding a tip below if you unlock it — we would rather leave a gap than give you wrong information.

Back at Headquarters between missions, walk to the evidence locker and interact with any item you have collected to inspect it. You need at least one piece of evidence recovered from a mission first, so finish a level and secure something before you go looking.
During Mirage at Sea you must apprehend Sah'id before the order to murder civilians is given, and finish with zero civilian deaths, on Standard or higher. That means moving fast and directly toward him rather than clearing the ship room by room, while still not getting anyone shot on the way. Learn the route on a normal run first, then replay with a beeline in mind. Bring flashbangs so you can push rooms quickly without trading fire.
You are not allowed to use anything from your own loadout — no weapons, no deployables, no tools. Everything must be done by commanding your AI officers. Pick a small map, hang back, and drive the whole clear through the command menu: order door openings, breaches, room clears, restraints and evidence collection. Standard difficulty or higher. Patience is the whole trick here.

The description calls it the kill me command — a hidden option you can issue to your own squad. Open the squad command menu and look through the available orders for the unusual one. We have not verified the exact menu path in the current build, so if the option is not where you expect, check a community guide rather than trusting a guess.

Complete 3 Letter Triad at rank C+ or better on Standard difficulty or higher (Easy will not count). The missions can be played in any order and in any game mode. Ranks in Ready or Not come from your post-mission score: completing every objective, keeping civilians and your own officers alive, arresting subjects instead of shooting them, and reporting each downed or restrained person and each piece of collected evidence to TOC. C+ is a forgiving bar — finish the objectives cleanly and report everything and you should clear it.
This achievement is hidden and Steam does not publish a description for it, so we are not going to guess the trigger. Rather than invent a requirement, we recommend checking a community guide or adding a tip below if you unlock it — we would rather leave a gap than give you wrong information.
Complete All Gods Burn at rank C+ or better on Standard difficulty or higher (Easy will not count). The missions can be played in any order and in any game mode. Ranks in Ready or Not come from your post-mission score: completing every objective, keeping civilians and your own officers alive, arresting subjects instead of shooting them, and reporting each downed or restrained person and each piece of collected evidence to TOC. C+ is a forgiving bar — finish the objectives cleanly and report everything and you should clear it.

This achievement is hidden and Steam does not publish a description for it, so we are not going to guess the trigger. Rather than invent a requirement, we recommend checking a community guide or adding a tip below if you unlock it — we would rather leave a gap than give you wrong information.

Complete No Good Deed at rank C+ or better on Standard difficulty or higher (Easy will not count). The missions can be played in any order and in any game mode. Ranks in Ready or Not come from your post-mission score: completing every objective, keeping civilians and your own officers alive, arresting subjects instead of shooting them, and reporting each downed or restrained person and each piece of collected evidence to TOC. C+ is a forgiving bar — finish the objectives cleanly and report everything and you should clear it.

A joke achievement tied to the coffee you can drink at Headquarters. Find the coffee interaction and keep using it past the point of sense. It costs nothing to try, so grab it on your next trip through HQ.

Boiling Point is a DLC campaign, and this asks you to find and use all of its major world interactables — the big scripted objects in the environment, not ordinary doors. Sweep each Boiling Point level slowly and press the use key on anything that offers a prompt. There is no in-game checklist, so if you finish all the levels and it has not popped, compare notes with a community guide for the ones you missed.

No firearms at all — a taser, flashbangs and bashing are your only tools, on Standard or higher. Flashbang every room before you enter so subjects are stunned when you arrive, then taser or bash whoever does not comply. The taser has a slow recovery, so take the shot only when you have a clean single target and your officers can cover the rest of the room. Bring as many flashbangs as your loadout allows.

Complete A New America at rank C+ or better on Standard difficulty or higher (Easy will not count). The missions can be played in any order and in any game mode. Ranks in Ready or Not come from your post-mission score: completing every objective, keeping civilians and your own officers alive, arresting subjects instead of shooting them, and reporting each downed or restrained person and each piece of collected evidence to TOC. C+ is a forgiving bar — finish the objectives cleanly and report everything and you should clear it.

Pistols only, no grenades and no launchers, on Standard or higher. That means no flashbangs to soften rooms, so lean on your squad: send officers in first, hold angles from doorways, and use the under-door mirror constantly so nothing surprises you. Rank does not matter here, only surviving the clear under the weapon restriction, so play slow.
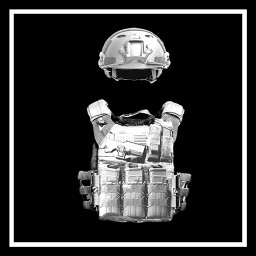
Run the mission with both the armour and helmet slots empty on Standard or higher. Without protection almost any hit will end your run, so treat it as a stealth-and-patience exercise: mirror under every door, flashbang before entry, let your officers take point and never stand in an open doorway. Weapons are unrestricted, so take whatever you shoot best with.
The big one. Every base game mission has to be finished at S rank on Standard difficulty or higher. S generally demands a perfect run: all objectives complete, no civilian or officer casualties, subjects arrested rather than killed wherever possible, and every downed person, restrained person and piece of evidence reported to TOC. The reporting step is what most people forget — walk the map at the end and make sure nothing is left unreported. Expect to learn each map layout properly and to restart runs that go wrong early.
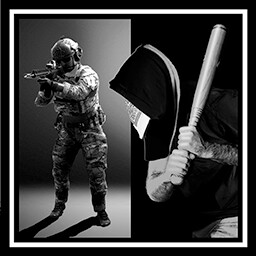
Every civilian on Lawmaker has to be zip-tied, and you must not neutralise a single suspect, on Standard or higher. Suspects still have to be dealt with non-lethally — arrests only. Load up on flashbangs and CS gas, shout early and often to force compliance, and command your officers to restrain rather than engage. The run-ender is usually one officer taking a lethal shot, so keep your squad on a restrained posture and clear rooms yourself where you can.

You have to die to a civilian rather than a suspect. Not every level has civilians who can hurt you, so this one is opportunistic: when a non-suspect turns out to be armed, let it happen instead of taking the shot. We have not verified which specific maps reliably produce an armed civilian in the current build, so treat this as one to grab when the situation presents itself rather than something to farm.

The Home Invasion DLC levels all have to be finished at S on Standard or higher. Same rules as the base game S runs: complete every objective, no civilian or officer deaths, arrest instead of shoot, and report every body, arrest and piece of evidence to TOC before you call it in. The Home Invasion maps are smaller and domestic, which makes a clean sweep more achievable than the big base game levels — but also means civilians are everywhere, so shout before you shoot.
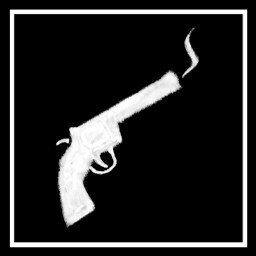
The .357 Magnum is your only weapon for the whole mission on Standard or higher — six rounds and a slow reload. Reload constantly, take single deliberate shots, and let your AI officers handle any room where several suspects are together. Non-weapon tactical gear is not restricted by the description, so a mirror and your squad commands are still available.
Only the main objectives need to be done, and only within five minutes, on Standard or higher — rank does not matter. Play Dorms normally a few times to learn exactly where the objectives sit, then run a dedicated speed attempt: sprint the route, use your squad to open doors ahead of you, and skip everything optional. Expect a few resets before the timing lines up.

A long-tail collection award covering all base game customisation unlocks. These come from playing missions and progressing, so it is largely a matter of volume rather than any specific trick. Work through the base game mission list, replay maps you enjoy, and check the customisation menus periodically to see what is still locked. DLC items are not required.

This achievement is hidden and Steam does not publish a description for it, so we are not going to guess the trigger. Rather than invent a requirement, we recommend checking a community guide or adding a tip below if you unlock it — we would rather leave a gap than give you wrong information.

Your AI officers develop traits as you play. This asks for every unique trait to have been unlocked at least once across your roster. It is a long-term progression award rather than something you can force in one session — keep playing missions with a full squad and rotating officers so different members earn different traits. Check the roster screen between missions to see which traits you are still missing.
Your loadout is limited to the VPL-25, CS gas, gasmasks and melee on Standard or higher. Gas is the plan: flood rooms with CS before entry so subjects are coughing and non-compliant targets are easy to restrain, and keep a gasmask on the whole time. Make sure your officers are equipped for gas too, or you will lose them to your own clouds.

Every Dark Waters DLC level at S on Standard or higher. The S criteria are the same as everywhere else: all objectives, zero civilian and officer casualties, arrests over kills, and everything reported to TOC. The Dark Waters maps are tight and vertical, so plan your entries and keep your squad close rather than splitting the team across floors.

Ironman mode on Standard difficulty or higher, run through to the end of Ready or Not. Ironman removes your safety net, so the whole approach changes: mirror every door, never rush a room, use your squad to take the first look, and treat every unexplored corner as hostile. Losing officers is allowed for this one — you only have to finish. Play slower than feels necessary.

The Hermit is The World with the hardest possible extra condition: an entire Ironman campaign on Standard or higher with no officer lost at any point. Keep your squad behind you, do not send officers into rooms you have not mirrored, use flashbangs and gas generously before any entry, and back out of a fight rather than trading shots. Most attempts end on one careless breach order, so slow down at exactly the moments you want to speed up.

During A Lethal Obsession there are audiotapes scattered through the level, and you have to play all of them in a single mission. Sweep the map thoroughly rather than beelining objectives, and interact with every tape player or recorder you find. Let each one finish playing. If you clear the level and it has not popped, you missed at least one — a full second sweep is usually faster than guessing.
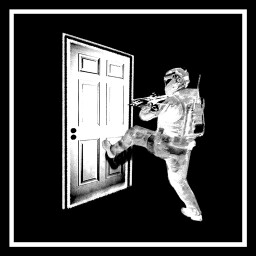
You need two officers who both have the Kicker trait active, assigned to the roster you take into a mission, and then a door has to be kicked open in that mission. Traits come from officer progression, so this waits on your roster developing two Kickers — check the roster screen between missions. Once you have them, any mission and any kicked door will do.

A capstone that fires once every other Home Invasion DLC achievement is unlocked, including After the Storm (S rank on all Home Invasion levels). Work through the individual DLC achievements first and this one will arrive on its own.

This achievement is hidden and Steam does not publish a description for it, so we are not going to guess the trigger. Rather than invent a requirement, we recommend checking a community guide or adding a tip below if you unlock it — we would rather leave a gap than give you wrong information.

Fifteen suspects apprehended or incapacitated consecutively, each within 15 seconds of the last, on 3 Letter Triad at Standard or higher. That is a chain — the clock resets with each one, but a 15-second gap breaks it. Learn where the suspects cluster, then run the map with the chain in mind: stack gas and flashbangs so groups go down together, and keep moving to the next contact immediately rather than stopping to report. Expect several attempts before the routing clicks.

During Leviathan you need headshots on two different active suspects, each from over 30 metres. Take a weapon with a magnified optic and find the long sightlines the map offers rather than fighting at room distance. The suspects must be active, so do not take the shot on someone already surrendering. Both hits count within the same mission run.
Every base game mission finished on Hard difficulty, in any game mode — rank is not part of this one, so you only have to complete them. Hard punishes sloppy entries heavily, so bring the full tactical kit, mirror every door and lead with your squad. Since rank does not matter you can afford ugly runs, which makes this much less demanding than Medal of Valor.

The Dark Waters capstone — it unlocks once every other Dark Waters achievement is done, From Land to Sea included. Clear the individual DLC achievements and this one follows automatically.
All Boiling Point DLC levels at S on Standard or higher. The usual S requirements apply: every objective done, no civilian or officer casualties, arrests preferred over kills, and every body, arrest and piece of evidence reported to TOC. Boiling Point adds toxic gas hazards, so plan your masks and route around the contaminated areas rather than sprinting through them.

Hard difficulty, no armour, no shield and no grenades of any kind. With no protection and nothing to soften a room, this becomes a pure discipline run: mirror every door, take angles from cover, let your officers enter first and never push into an open space. Weapons themselves are not restricted, so take the most reliable rifle you have and make first shots count.
A New America completed on Hard while you are alone in a multiplayer lobby — a genuinely solo run with no AI squad to lean on. Everything you would normally delegate is now yours: every door, every corner, every restraint. Move at half speed, mirror constantly, and use the doorway as your cover rather than entering rooms. This is one of the hardest asks in the game, so learn the layout on easier runs first.

In any Boiling Point mission, while you are actively taking damage from the toxic gas, incapacitate three different active suspects within five seconds of each other, on Standard or higher. Two things have to line up: you standing in the gas taking damage, and three active suspects close enough to drop in quick succession. Find a room where suspects group up, deliberately step into the contaminated area without a mask sealing you off, and take them fast. Have a plan to break contact immediately afterwards, because the gas does not stop.