
A lot of this list is single-run conditions that don’t conflict with each other, so you can earn several at once instead of replaying for each. Each plan below is one run. Achievements in a plan are marked with a ⛓ badge further down.
All four are per-run counters with nothing that conflicts. Buy freely, pick up everything that drops and recycle weapons you are not keeping instead of selling.
- ✓▢Hungry — Pick up 20 consumables during a run
- ✓▢Scavenger — Get 10 different tier I items during a run
- ✓▢Recycling — Recycle 12 weapons during a run
- ✓▢Baited — Get 2 Bait during a run
Turrets count as structures, so a build that puts five turrets on the map already satisfies the three-structure half of both damage achievements. Push Ranged and Elemental Damage to 10 in the same run.
- ✓▢Industrialization — Get 5 turrets on the map simultaneously
- ✓▢Advanced Technology — Reach 10 Ranged Damage and get 3 structures at the same time
- ✓▢Magic and Machinery — Reach 10 Elemental Damage and get 3 structures at the same time
Advanced Technology and Magic and Machinery ask for different damage stats but the same three structures, so the structures only have to be built once.

Kill 300 enemies. This one is exactly what the description says — no hidden trigger. Work it into your normal runs: cumulative-total goals (kills, materials, steps) tick up across every run, while single-run or single-stat goals are easiest to force by building specifically toward them (stack the relevant stat or set up the situation the description asks for on a low Danger level).

Collect 300 materials. This one is exactly what the description says — no hidden trigger. Work it into your normal runs: cumulative-total goals (kills, materials, steps) tick up across every run, while single-run or single-stat goals are easiest to force by building specifically toward them (stack the relevant stat or set up the situation the description asks for on a low Danger level).

Die for the first time. This one is exactly what the description says — no hidden trigger. Work it into your normal runs: cumulative-total goals (kills, materials, steps) tick up across every run, while single-run or single-stat goals are easiest to force by building specifically toward them (stack the relevant stat or set up the situation the description asks for on a low Danger level).
Kill 2000 enemies. This one is exactly what the description says — no hidden trigger. Work it into your normal runs: cumulative-total goals (kills, materials, steps) tick up across every run, while single-run or single-stat goals are easiest to force by building specifically toward them (stack the relevant stat or set up the situation the description asks for on a low Danger level).

Pick up 20 consumables during a run. This one is exactly what the description says — no hidden trigger. Work it into your normal runs: cumulative-total goals (kills, materials, steps) tick up across every run, while single-run or single-stat goals are easiest to force by building specifically toward them (stack the relevant stat or set up the situation the description asks for on a low Danger level).
Collect 2000 materials. This one is exactly what the description says — no hidden trigger. Work it into your normal runs: cumulative-total goals (kills, materials, steps) tick up across every run, while single-run or single-stat goals are easiest to force by building specifically toward them (stack the relevant stat or set up the situation the description asks for on a low Danger level).
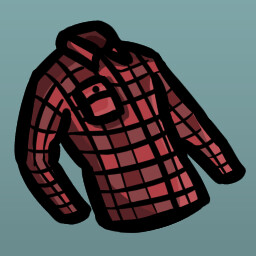
Kill 50 trees. This one is exactly what the description says — no hidden trigger. Work it into your normal runs: cumulative-total goals (kills, materials, steps) tick up across every run, while single-run or single-stat goals are easiest to force by building specifically toward them (stack the relevant stat or set up the situation the description asks for on a low Danger level).
Kill 5000 enemies. This one is exactly what the description says — no hidden trigger. Work it into your normal runs: cumulative-total goals (kills, materials, steps) tick up across every run, while single-run or single-stat goals are easiest to force by building specifically toward them (stack the relevant stat or set up the situation the description asks for on a low Danger level).
Collect 5000 materials. This one is exactly what the description says — no hidden trigger. Work it into your normal runs: cumulative-total goals (kills, materials, steps) tick up across every run, while single-run or single-stat goals are easiest to force by building specifically toward them (stack the relevant stat or set up the situation the description asks for on a low Danger level).
Kill 10000 enemies. This one is exactly what the description says — no hidden trigger. Work it into your normal runs: cumulative-total goals (kills, materials, steps) tick up across every run, while single-run or single-stat goals are easiest to force by building specifically toward them (stack the relevant stat or set up the situation the description asks for on a low Danger level).
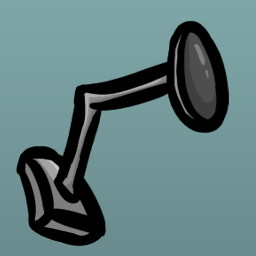
Get 10 different tier I items during a run. This one is exactly what the description says — no hidden trigger. Work it into your normal runs: cumulative-total goals (kills, materials, steps) tick up across every run, while single-run or single-stat goals are easiest to force by building specifically toward them (stack the relevant stat or set up the situation the description asks for on a low Danger level).
Collect 10000 materials. This one is exactly what the description says — no hidden trigger. Work it into your normal runs: cumulative-total goals (kills, materials, steps) tick up across every run, while single-run or single-stat goals are easiest to force by building specifically toward them (stack the relevant stat or set up the situation the description asks for on a low Danger level).

Win a run in Danger 0. Danger levels raise enemy count, health and damage. Reach Danger 0 by winning runs at the level below it, then win one full run at Danger 0. Higher Danger rewards more materials, so a strong economy build helps.

Reach level 20. This one is exactly what the description says — no hidden trigger. Work it into your normal runs: cumulative-total goals (kills, materials, steps) tick up across every run, while single-run or single-stat goals are easiest to force by building specifically toward them (stack the relevant stat or set up the situation the description asks for on a low Danger level).
Kill 20000 enemies. This one is exactly what the description says — no hidden trigger. Work it into your normal runs: cumulative-total goals (kills, materials, steps) tick up across every run, while single-run or single-stat goals are easiest to force by building specifically toward them (stack the relevant stat or set up the situation the description asks for on a low Danger level).
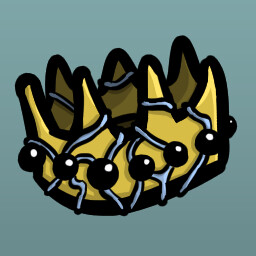
Get 3 tier IV weapons at once. This one is exactly what the description says — no hidden trigger. Work it into your normal runs: cumulative-total goals (kills, materials, steps) tick up across every run, while single-run or single-stat goals are easiest to force by building specifically toward them (stack the relevant stat or set up the situation the description asks for on a low Danger level).

Get 5 turrets on the map simultaneously. This one is exactly what the description says — no hidden trigger. Work it into your normal runs: cumulative-total goals (kills, materials, steps) tick up across every run, while single-run or single-stat goals are easiest to force by building specifically toward them (stack the relevant stat or set up the situation the description asks for on a low Danger level).
Collect 20000 materials. This one is exactly what the description says — no hidden trigger. Work it into your normal runs: cumulative-total goals (kills, materials, steps) tick up across every run, while single-run or single-stat goals are easiest to force by building specifically toward them (stack the relevant stat or set up the situation the description asks for on a low Danger level).

Heal 200 HP in one wave. This one is exactly what the description says — no hidden trigger. Work it into your normal runs: cumulative-total goals (kills, materials, steps) tick up across every run, while single-run or single-stat goals are easiest to force by building specifically toward them (stack the relevant stat or set up the situation the description asks for on a low Danger level).

Win a run in Danger 1. Danger levels raise enemy count, health and damage. Reach Danger 1 by winning runs at the level below it, then win one full run at Danger 1. Higher Danger rewards more materials, so a strong economy build helps.

Reach 100 Max HP. This one is exactly what the description says — no hidden trigger. Work it into your normal runs: cumulative-total goals (kills, materials, steps) tick up across every run, while single-run or single-stat goals are easiest to force by building specifically toward them (stack the relevant stat or set up the situation the description asks for on a low Danger level).

Kill 15 enemies with a single explosion. This one is exactly what the description says — no hidden trigger. Work it into your normal runs: cumulative-total goals (kills, materials, steps) tick up across every run, while single-run or single-stat goals are easiest to force by building specifically toward them (stack the relevant stat or set up the situation the description asks for on a low Danger level).

Reach 60 % Dodge. This one is exactly what the description says — no hidden trigger. Work it into your normal runs: cumulative-total goals (kills, materials, steps) tick up across every run, while single-run or single-stat goals are easiest to force by building specifically toward them (stack the relevant stat or set up the situation the description asks for on a low Danger level).
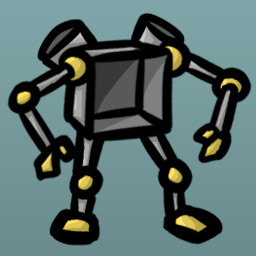
Reach 10 Ranged Damage and get 3 structures at the same time. This one is exactly what the description says — no hidden trigger. Work it into your normal runs: cumulative-total goals (kills, materials, steps) tick up across every run, while single-run or single-stat goals are easiest to force by building specifically toward them (stack the relevant stat or set up the situation the description asks for on a low Danger level).

Win a run in Danger 2. Danger levels raise enemy count, health and damage. Reach Danger 2 by winning runs at the level below it, then win one full run at Danger 2. Higher Danger rewards more materials, so a strong economy build helps.

Reach -5 HP Regeneration. This one is exactly what the description says — no hidden trigger. Work it into your normal runs: cumulative-total goals (kills, materials, steps) tick up across every run, while single-run or single-stat goals are easiest to force by building specifically toward them (stack the relevant stat or set up the situation the description asks for on a low Danger level).

Kill a boss or an elite in less than 15 seconds. This one is exactly what the description says — no hidden trigger. Work it into your normal runs: cumulative-total goals (kills, materials, steps) tick up across every run, while single-run or single-stat goals are easiest to force by building specifically toward them (stack the relevant stat or set up the situation the description asks for on a low Danger level).

Win a run in Danger 3. Danger levels raise enemy count, health and damage. Reach Danger 3 by winning runs at the level below it, then win one full run at Danger 3. Higher Danger rewards more materials, so a strong economy build helps.

Reach 200 Harvesting. This one is exactly what the description says — no hidden trigger. Work it into your normal runs: cumulative-total goals (kills, materials, steps) tick up across every run, while single-run or single-stat goals are easiest to force by building specifically toward them (stack the relevant stat or set up the situation the description asks for on a low Danger level).
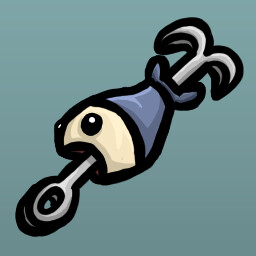
Get 2 Bait during a run. This one is exactly what the description says — no hidden trigger. Work it into your normal runs: cumulative-total goals (kills, materials, steps) tick up across every run, while single-run or single-stat goals are easiest to force by building specifically toward them (stack the relevant stat or set up the situation the description asks for on a low Danger level).
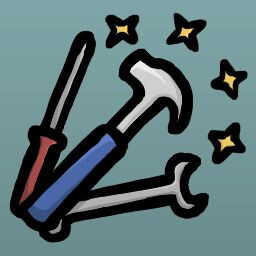
Have 6 different weapons at once. This one is exactly what the description says — no hidden trigger. Work it into your normal runs: cumulative-total goals (kills, materials, steps) tick up across every run, while single-run or single-stat goals are easiest to force by building specifically toward them (stack the relevant stat or set up the situation the description asks for on a low Danger level).

Reach 300 Range. This one is exactly what the description says — no hidden trigger. Work it into your normal runs: cumulative-total goals (kills, materials, steps) tick up across every run, while single-run or single-stat goals are easiest to force by building specifically toward them (stack the relevant stat or set up the situation the description asks for on a low Danger level).
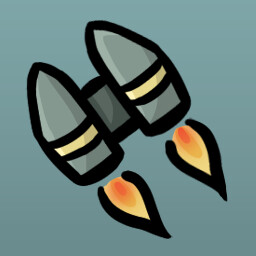
Reach 50 % Speed. This one is exactly what the description says — no hidden trigger. Work it into your normal runs: cumulative-total goals (kills, materials, steps) tick up across every run, while single-run or single-stat goals are easiest to force by building specifically toward them (stack the relevant stat or set up the situation the description asks for on a low Danger level).

Win a run in Danger 4. Danger levels raise enemy count, health and damage. Reach Danger 4 by winning runs at the level below it, then win one full run at Danger 4. Higher Danger rewards more materials, so a strong economy build helps.

Finish a wave with 1 HP. This one is exactly what the description says — no hidden trigger. Work it into your normal runs: cumulative-total goals (kills, materials, steps) tick up across every run, while single-run or single-stat goals are easiest to force by building specifically toward them (stack the relevant stat or set up the situation the description asks for on a low Danger level).
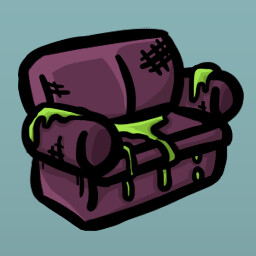
Reach -20 % Speed. This one is exactly what the description says — no hidden trigger. Work it into your normal runs: cumulative-total goals (kills, materials, steps) tick up across every run, while single-run or single-stat goals are easiest to force by building specifically toward them (stack the relevant stat or set up the situation the description asks for on a low Danger level).
Reach 10 Elemental Damage and get 3 structures at the same time. This one is exactly what the description says — no hidden trigger. Work it into your normal runs: cumulative-total goals (kills, materials, steps) tick up across every run, while single-run or single-stat goals are easiest to force by building specifically toward them (stack the relevant stat or set up the situation the description asks for on a low Danger level).
Win a run with Ranger in Crash Zone. Crash Zone is one of Brotato's alternate run modes, unlocked as you progress; select it from the difficulty/mode options before starting a run. Pick Ranger, then survive every wave through to the end of the run. Each character starts with its own stat spread and signature items, so lean into whatever that build is strongest at and shore up its weakness with shop purchases between waves. Lower the Danger level if you are struggling — the win still counts.

Win a run with Well-Rounded in Crash Zone. Crash Zone is one of Brotato's alternate run modes, unlocked as you progress; select it from the difficulty/mode options before starting a run. Pick Well-Rounded, then survive every wave through to the end of the run. Each character starts with its own stat spread and signature items, so lean into whatever that build is strongest at and shore up its weakness with shop purchases between waves. Lower the Danger level if you are struggling — the win still counts.

Win a run in Danger 5. Danger levels raise enemy count, health and damage. Reach Danger 5 by winning runs at the level below it, then win one full run at Danger 5. Higher Danger rewards more materials, so a strong economy build helps.

Hold 3000 materials. This one is exactly what the description says — no hidden trigger. Work it into your normal runs: cumulative-total goals (kills, materials, steps) tick up across every run, while single-run or single-stat goals are easiest to force by building specifically toward them (stack the relevant stat or set up the situation the description asks for on a low Danger level).

Win a run with Engineer in Crash Zone. Crash Zone is one of Brotato's alternate run modes, unlocked as you progress; select it from the difficulty/mode options before starting a run. Pick Engineer, then survive every wave through to the end of the run. Each character starts with its own stat spread and signature items, so lean into whatever that build is strongest at and shore up its weakness with shop purchases between waves. Lower the Danger level if you are struggling — the win still counts.

Win a run with Brawler in Crash Zone. Crash Zone is one of Brotato's alternate run modes, unlocked as you progress; select it from the difficulty/mode options before starting a run. Pick Brawler, then survive every wave through to the end of the run. Each character starts with its own stat spread and signature items, so lean into whatever that build is strongest at and shore up its weakness with shop purchases between waves. Lower the Danger level if you are struggling — the win still counts.

Win a run with Mage in Crash Zone. Crash Zone is one of Brotato's alternate run modes, unlocked as you progress; select it from the difficulty/mode options before starting a run. Pick Mage, then survive every wave through to the end of the run. Each character starts with its own stat spread and signature items, so lean into whatever that build is strongest at and shore up its weakness with shop purchases between waves. Lower the Danger level if you are struggling — the win still counts.

Win a run with Bull in Crash Zone. Crash Zone is one of Brotato's alternate run modes, unlocked as you progress; select it from the difficulty/mode options before starting a run. Pick Bull, then survive every wave through to the end of the run. Each character starts with its own stat spread and signature items, so lean into whatever that build is strongest at and shore up its weakness with shop purchases between waves. Lower the Danger level if you are struggling — the win still counts.

Recycle 12 weapons during a run. This one is exactly what the description says — no hidden trigger. Work it into your normal runs: cumulative-total goals (kills, materials, steps) tick up across every run, while single-run or single-stat goals are easiest to force by building specifically toward them (stack the relevant stat or set up the situation the description asks for on a low Danger level).

Win a run with Multitasker in Crash Zone. Crash Zone is one of Brotato's alternate run modes, unlocked as you progress; select it from the difficulty/mode options before starting a run. Pick Multitasker, then survive every wave through to the end of the run. Each character starts with its own stat spread and signature items, so lean into whatever that build is strongest at and shore up its weakness with shop purchases between waves. Lower the Danger level if you are struggling — the win still counts.

Win a run with Lucky in Crash Zone. Crash Zone is one of Brotato's alternate run modes, unlocked as you progress; select it from the difficulty/mode options before starting a run. Pick Lucky, then survive every wave through to the end of the run. Each character starts with its own stat spread and signature items, so lean into whatever that build is strongest at and shore up its weakness with shop purchases between waves. Lower the Danger level if you are struggling — the win still counts.

Reach level 10 before wave 6. This one is exactly what the description says — no hidden trigger. Work it into your normal runs: cumulative-total goals (kills, materials, steps) tick up across every run, while single-run or single-stat goals are easiest to force by building specifically toward them (stack the relevant stat or set up the situation the description asks for on a low Danger level).

Win a run with Crazy in Crash Zone. Crash Zone is one of Brotato's alternate run modes, unlocked as you progress; select it from the difficulty/mode options before starting a run. Pick Crazy, then survive every wave through to the end of the run. Each character starts with its own stat spread and signature items, so lean into whatever that build is strongest at and shore up its weakness with shop purchases between waves. Lower the Danger level if you are struggling — the win still counts.

Win a run with Ghost in Crash Zone. Crash Zone is one of Brotato's alternate run modes, unlocked as you progress; select it from the difficulty/mode options before starting a run. Pick Ghost, then survive every wave through to the end of the run. Each character starts with its own stat spread and signature items, so lean into whatever that build is strongest at and shore up its weakness with shop purchases between waves. Lower the Danger level if you are struggling — the win still counts.

Reach 40 % Life Steal. This one is exactly what the description says — no hidden trigger. Work it into your normal runs: cumulative-total goals (kills, materials, steps) tick up across every run, while single-run or single-stat goals are easiest to force by building specifically toward them (stack the relevant stat or set up the situation the description asks for on a low Danger level).

Win a run with Loud in Crash Zone. Crash Zone is one of Brotato's alternate run modes, unlocked as you progress; select it from the difficulty/mode options before starting a run. Pick Loud, then survive every wave through to the end of the run. Each character starts with its own stat spread and signature items, so lean into whatever that build is strongest at and shore up its weakness with shop purchases between waves. Lower the Danger level if you are struggling — the win still counts.
Win a run with Mutant in Crash Zone. Crash Zone is one of Brotato's alternate run modes, unlocked as you progress; select it from the difficulty/mode options before starting a run. Pick Mutant, then survive every wave through to the end of the run. Each character starts with its own stat spread and signature items, so lean into whatever that build is strongest at and shore up its weakness with shop purchases between waves. Lower the Danger level if you are struggling — the win still counts.

Win a run with Doctor in Crash Zone. Crash Zone is one of Brotato's alternate run modes, unlocked as you progress; select it from the difficulty/mode options before starting a run. Pick Doctor, then survive every wave through to the end of the run. Each character starts with its own stat spread and signature items, so lean into whatever that build is strongest at and shore up its weakness with shop purchases between waves. Lower the Danger level if you are struggling — the win still counts.

Win a run with King in Crash Zone. Crash Zone is one of Brotato's alternate run modes, unlocked as you progress; select it from the difficulty/mode options before starting a run. Pick King, then survive every wave through to the end of the run. Each character starts with its own stat spread and signature items, so lean into whatever that build is strongest at and shore up its weakness with shop purchases between waves. Lower the Danger level if you are struggling — the win still counts.

Win a run with Old in Crash Zone. Crash Zone is one of Brotato's alternate run modes, unlocked as you progress; select it from the difficulty/mode options before starting a run. Pick Old, then survive every wave through to the end of the run. Each character starts with its own stat spread and signature items, so lean into whatever that build is strongest at and shore up its weakness with shop purchases between waves. Lower the Danger level if you are struggling — the win still counts.
Kill 1000 enemies that are more than 700 range away from you. This one is exactly what the description says — no hidden trigger. Work it into your normal runs: cumulative-total goals (kills, materials, steps) tick up across every run, while single-run or single-stat goals are easiest to force by building specifically toward them (stack the relevant stat or set up the situation the description asks for on a low Danger level).

Win a run with One-Armed in Crash Zone. Crash Zone is one of Brotato's alternate run modes, unlocked as you progress; select it from the difficulty/mode options before starting a run. Pick One-Armed, then survive every wave through to the end of the run. Each character starts with its own stat spread and signature items, so lean into whatever that build is strongest at and shore up its weakness with shop purchases between waves. Lower the Danger level if you are struggling — the win still counts.

Win a run with Soldier in Crash Zone. Crash Zone is one of Brotato's alternate run modes, unlocked as you progress; select it from the difficulty/mode options before starting a run. Pick Soldier, then survive every wave through to the end of the run. Each character starts with its own stat spread and signature items, so lean into whatever that build is strongest at and shore up its weakness with shop purchases between waves. Lower the Danger level if you are struggling — the win still counts.

Win a run with Chunky in Crash Zone. Crash Zone is one of Brotato's alternate run modes, unlocked as you progress; select it from the difficulty/mode options before starting a run. Pick Chunky, then survive every wave through to the end of the run. Each character starts with its own stat spread and signature items, so lean into whatever that build is strongest at and shore up its weakness with shop purchases between waves. Lower the Danger level if you are struggling — the win still counts.

Win a run with Pacifist in Crash Zone. Crash Zone is one of Brotato's alternate run modes, unlocked as you progress; select it from the difficulty/mode options before starting a run. Pick Pacifist, then survive every wave through to the end of the run. Each character starts with its own stat spread and signature items, so lean into whatever that build is strongest at and shore up its weakness with shop purchases between waves. Lower the Danger level if you are struggling — the win still counts.

Reach 100 % Pickup Range. This one is exactly what the description says — no hidden trigger. Work it into your normal runs: cumulative-total goals (kills, materials, steps) tick up across every run, while single-run or single-stat goals are easiest to force by building specifically toward them (stack the relevant stat or set up the situation the description asks for on a low Danger level).

Win a run with Lich in Crash Zone. Crash Zone is one of Brotato's alternate run modes, unlocked as you progress; select it from the difficulty/mode options before starting a run. Pick Lich, then survive every wave through to the end of the run. Each character starts with its own stat spread and signature items, so lean into whatever that build is strongest at and shore up its weakness with shop purchases between waves. Lower the Danger level if you are struggling — the win still counts.

Win a run with Cyborg in Crash Zone. Crash Zone is one of Brotato's alternate run modes, unlocked as you progress; select it from the difficulty/mode options before starting a run. Pick Cyborg, then survive every wave through to the end of the run. Each character starts with its own stat spread and signature items, so lean into whatever that build is strongest at and shore up its weakness with shop purchases between waves. Lower the Danger level if you are struggling — the win still counts.

Deal 1000 damage to an enemy in a single hit. This one is exactly what the description says — no hidden trigger. Work it into your normal runs: cumulative-total goals (kills, materials, steps) tick up across every run, while single-run or single-stat goals are easiest to force by building specifically toward them (stack the relevant stat or set up the situation the description asks for on a low Danger level).

Win a run with Knight in Crash Zone. Crash Zone is one of Brotato's alternate run modes, unlocked as you progress; select it from the difficulty/mode options before starting a run. Pick Knight, then survive every wave through to the end of the run. Each character starts with its own stat spread and signature items, so lean into whatever that build is strongest at and shore up its weakness with shop purchases between waves. Lower the Danger level if you are struggling — the win still counts.

Finish a wave with 10 or more living trees. This one is exactly what the description says — no hidden trigger. Work it into your normal runs: cumulative-total goals (kills, materials, steps) tick up across every run, while single-run or single-stat goals are easiest to force by building specifically toward them (stack the relevant stat or set up the situation the description asks for on a low Danger level).

Win a run with Generalist in Crash Zone. Crash Zone is one of Brotato's alternate run modes, unlocked as you progress; select it from the difficulty/mode options before starting a run. Pick Generalist, then survive every wave through to the end of the run. Each character starts with its own stat spread and signature items, so lean into whatever that build is strongest at and shore up its weakness with shop purchases between waves. Lower the Danger level if you are struggling — the win still counts.

Win a run with Masochist in Crash Zone. Crash Zone is one of Brotato's alternate run modes, unlocked as you progress; select it from the difficulty/mode options before starting a run. Pick Masochist, then survive every wave through to the end of the run. Each character starts with its own stat spread and signature items, so lean into whatever that build is strongest at and shore up its weakness with shop purchases between waves. Lower the Danger level if you are struggling — the win still counts.
Walk a total of 20000 steps. This one is exactly what the description says — no hidden trigger. Work it into your normal runs: cumulative-total goals (kills, materials, steps) tick up across every run, while single-run or single-stat goals are easiest to force by building specifically toward them (stack the relevant stat or set up the situation the description asks for on a low Danger level).

Have at least 25 enemies burning at the same time. This one is exactly what the description says — no hidden trigger. Work it into your normal runs: cumulative-total goals (kills, materials, steps) tick up across every run, while single-run or single-stat goals are easiest to force by building specifically toward them (stack the relevant stat or set up the situation the description asks for on a low Danger level).

Reroll 10 times in a single shop. This one is exactly what the description says — no hidden trigger. Work it into your normal runs: cumulative-total goals (kills, materials, steps) tick up across every run, while single-run or single-stat goals are easiest to force by building specifically toward them (stack the relevant stat or set up the situation the description asks for on a low Danger level).

Win a run with Explorer in Crash Zone. Crash Zone is one of Brotato's alternate run modes, unlocked as you progress; select it from the difficulty/mode options before starting a run. Pick Explorer, then survive every wave through to the end of the run. Each character starts with its own stat spread and signature items, so lean into whatever that build is strongest at and shore up its weakness with shop purchases between waves. Lower the Danger level if you are struggling — the win still counts.

Win a run with Wildling in Crash Zone. Crash Zone is one of Brotato's alternate run modes, unlocked as you progress; select it from the difficulty/mode options before starting a run. Pick Wildling, then survive every wave through to the end of the run. Each character starts with its own stat spread and signature items, so lean into whatever that build is strongest at and shore up its weakness with shop purchases between waves. Lower the Danger level if you are struggling — the win still counts.

Win a run with Saver in Crash Zone. Crash Zone is one of Brotato's alternate run modes, unlocked as you progress; select it from the difficulty/mode options before starting a run. Pick Saver, then survive every wave through to the end of the run. Each character starts with its own stat spread and signature items, so lean into whatever that build is strongest at and shore up its weakness with shop purchases between waves. Lower the Danger level if you are struggling — the win still counts.

Win a run with Gladiator in Crash Zone. Crash Zone is one of Brotato's alternate run modes, unlocked as you progress; select it from the difficulty/mode options before starting a run. Pick Gladiator, then survive every wave through to the end of the run. Each character starts with its own stat spread and signature items, so lean into whatever that build is strongest at and shore up its weakness with shop purchases between waves. Lower the Danger level if you are struggling — the win still counts.

Win a run with Artificer in Crash Zone. Crash Zone is one of Brotato's alternate run modes, unlocked as you progress; select it from the difficulty/mode options before starting a run. Pick Artificer, then survive every wave through to the end of the run. Each character starts with its own stat spread and signature items, so lean into whatever that build is strongest at and shore up its weakness with shop purchases between waves. Lower the Danger level if you are struggling — the win still counts.

Collect 250 consumables by the end of wave 20. This one is exactly what the description says — no hidden trigger. Work it into your normal runs: cumulative-total goals (kills, materials, steps) tick up across every run, while single-run or single-stat goals are easiest to force by building specifically toward them (stack the relevant stat or set up the situation the description asks for on a low Danger level).

Win a run with Hunter in Crash Zone. Crash Zone is one of Brotato's alternate run modes, unlocked as you progress; select it from the difficulty/mode options before starting a run. Pick Hunter, then survive every wave through to the end of the run. Each character starts with its own stat spread and signature items, so lean into whatever that build is strongest at and shore up its weakness with shop purchases between waves. Lower the Danger level if you are struggling — the win still counts.

Win a run with Demon in Crash Zone. Crash Zone is one of Brotato's alternate run modes, unlocked as you progress; select it from the difficulty/mode options before starting a run. Pick Demon, then survive every wave through to the end of the run. Each character starts with its own stat spread and signature items, so lean into whatever that build is strongest at and shore up its weakness with shop purchases between waves. Lower the Danger level if you are struggling — the win still counts.

Win a run with Farmer in Crash Zone. Crash Zone is one of Brotato's alternate run modes, unlocked as you progress; select it from the difficulty/mode options before starting a run. Pick Farmer, then survive every wave through to the end of the run. Each character starts with its own stat spread and signature items, so lean into whatever that build is strongest at and shore up its weakness with shop purchases between waves. Lower the Danger level if you are struggling — the win still counts.

Win a run with Speedy in Crash Zone. Crash Zone is one of Brotato's alternate run modes, unlocked as you progress; select it from the difficulty/mode options before starting a run. Pick Speedy, then survive every wave through to the end of the run. Each character starts with its own stat spread and signature items, so lean into whatever that build is strongest at and shore up its weakness with shop purchases between waves. Lower the Danger level if you are struggling — the win still counts.

Win a run with Sick in Crash Zone. Crash Zone is one of Brotato's alternate run modes, unlocked as you progress; select it from the difficulty/mode options before starting a run. Pick Sick, then survive every wave through to the end of the run. Each character starts with its own stat spread and signature items, so lean into whatever that build is strongest at and shore up its weakness with shop purchases between waves. Lower the Danger level if you are struggling — the win still counts.

Win a run with Renegade in Crash Zone. Crash Zone is one of Brotato's alternate run modes, unlocked as you progress; select it from the difficulty/mode options before starting a run. Pick Renegade, then survive every wave through to the end of the run. Each character starts with its own stat spread and signature items, so lean into whatever that build is strongest at and shore up its weakness with shop purchases between waves. Lower the Danger level if you are struggling — the win still counts.

Win a run with Glutton in Crash Zone. Crash Zone is one of Brotato's alternate run modes, unlocked as you progress; select it from the difficulty/mode options before starting a run. Pick Glutton, then survive every wave through to the end of the run. Each character starts with its own stat spread and signature items, so lean into whatever that build is strongest at and shore up its weakness with shop purchases between waves. Lower the Danger level if you are struggling — the win still counts.

Win a run with Entrepreneur in Crash Zone. Crash Zone is one of Brotato's alternate run modes, unlocked as you progress; select it from the difficulty/mode options before starting a run. Pick Entrepreneur, then survive every wave through to the end of the run. Each character starts with its own stat spread and signature items, so lean into whatever that build is strongest at and shore up its weakness with shop purchases between waves. Lower the Danger level if you are struggling — the win still counts.

Win a run with Apprentice in Crash Zone. Crash Zone is one of Brotato's alternate run modes, unlocked as you progress; select it from the difficulty/mode options before starting a run. Pick Apprentice, then survive every wave through to the end of the run. Each character starts with its own stat spread and signature items, so lean into whatever that build is strongest at and shore up its weakness with shop purchases between waves. Lower the Danger level if you are struggling — the win still counts.

Hit at least 25 enemies with a single melee attack. This one is exactly what the description says — no hidden trigger. Work it into your normal runs: cumulative-total goals (kills, materials, steps) tick up across every run, while single-run or single-stat goals are easiest to force by building specifically toward them (stack the relevant stat or set up the situation the description asks for on a low Danger level).

Win a run with Golem in Crash Zone. Crash Zone is one of Brotato's alternate run modes, unlocked as you progress; select it from the difficulty/mode options before starting a run. Pick Golem, then survive every wave through to the end of the run. Each character starts with its own stat spread and signature items, so lean into whatever that build is strongest at and shore up its weakness with shop purchases between waves. Lower the Danger level if you are struggling — the win still counts.

Win a run with Streamer in Crash Zone. Crash Zone is one of Brotato's alternate run modes, unlocked as you progress; select it from the difficulty/mode options before starting a run. Pick Streamer, then survive every wave through to the end of the run. Each character starts with its own stat spread and signature items, so lean into whatever that build is strongest at and shore up its weakness with shop purchases between waves. Lower the Danger level if you are struggling — the win still counts.

Win a run with Jack in Crash Zone. Crash Zone is one of Brotato's alternate run modes, unlocked as you progress; select it from the difficulty/mode options before starting a run. Pick Jack, then survive every wave through to the end of the run. Each character starts with its own stat spread and signature items, so lean into whatever that build is strongest at and shore up its weakness with shop purchases between waves. Lower the Danger level if you are struggling — the win still counts.

Win a run with Fisherman in Crash Zone. Crash Zone is one of Brotato's alternate run modes, unlocked as you progress; select it from the difficulty/mode options before starting a run. Pick Fisherman, then survive every wave through to the end of the run. Each character starts with its own stat spread and signature items, so lean into whatever that build is strongest at and shore up its weakness with shop purchases between waves. Lower the Danger level if you are struggling — the win still counts.

Finish a run with 0 Curse. This one is exactly what the description says — no hidden trigger. Work it into your normal runs: cumulative-total goals (kills, materials, steps) tick up across every run, while single-run or single-stat goals are easiest to force by building specifically toward them (stack the relevant stat or set up the situation the description asks for on a low Danger level).

Win a run with Arms Dealer in Crash Zone. Crash Zone is one of Brotato's alternate run modes, unlocked as you progress; select it from the difficulty/mode options before starting a run. Pick Arms Dealer, then survive every wave through to the end of the run. Each character starts with its own stat spread and signature items, so lean into whatever that build is strongest at and shore up its weakness with shop purchases between waves. Lower the Danger level if you are struggling — the win still counts.

Win a run with Technomage in Crash Zone. Crash Zone is one of Brotato's alternate run modes, unlocked as you progress; select it from the difficulty/mode options before starting a run. Pick Technomage, then survive every wave through to the end of the run. Each character starts with its own stat spread and signature items, so lean into whatever that build is strongest at and shore up its weakness with shop purchases between waves. Lower the Danger level if you are struggling — the win still counts.

Win a run with Cryptid in Crash Zone. Crash Zone is one of Brotato's alternate run modes, unlocked as you progress; select it from the difficulty/mode options before starting a run. Pick Cryptid, then survive every wave through to the end of the run. Each character starts with its own stat spread and signature items, so lean into whatever that build is strongest at and shore up its weakness with shop purchases between waves. Lower the Danger level if you are struggling — the win still counts.

Win a run with Baby in Crash Zone. Crash Zone is one of Brotato's alternate run modes, unlocked as you progress; select it from the difficulty/mode options before starting a run. Pick Baby, then survive every wave through to the end of the run. Each character starts with its own stat spread and signature items, so lean into whatever that build is strongest at and shore up its weakness with shop purchases between waves. Lower the Danger level if you are struggling — the win still counts.

Win a run with Vampire in Crash Zone. Crash Zone is one of Brotato's alternate run modes, unlocked as you progress; select it from the difficulty/mode options before starting a run. Pick Vampire, then survive every wave through to the end of the run. Each character starts with its own stat spread and signature items, so lean into whatever that build is strongest at and shore up its weakness with shop purchases between waves. Lower the Danger level if you are struggling — the win still counts.

Win a run with Creature in Crash Zone. Crash Zone is one of Brotato's alternate run modes, unlocked as you progress; select it from the difficulty/mode options before starting a run. Pick Creature, then survive every wave through to the end of the run. Each character starts with its own stat spread and signature items, so lean into whatever that build is strongest at and shore up its weakness with shop purchases between waves. Lower the Danger level if you are struggling — the win still counts.

Win a run with Vagabond in Crash Zone. Crash Zone is one of Brotato's alternate run modes, unlocked as you progress; select it from the difficulty/mode options before starting a run. Pick Vagabond, then survive every wave through to the end of the run. Each character starts with its own stat spread and signature items, so lean into whatever that build is strongest at and shore up its weakness with shop purchases between waves. Lower the Danger level if you are struggling — the win still counts.

Win a run with Builder in Crash Zone. Crash Zone is one of Brotato's alternate run modes, unlocked as you progress; select it from the difficulty/mode options before starting a run. Pick Builder, then survive every wave through to the end of the run. Each character starts with its own stat spread and signature items, so lean into whatever that build is strongest at and shore up its weakness with shop purchases between waves. Lower the Danger level if you are struggling — the win still counts.

Win a run with Sailor in Crash Zone. Crash Zone is one of Brotato's alternate run modes, unlocked as you progress; select it from the difficulty/mode options before starting a run. Pick Sailor, then survive every wave through to the end of the run. Each character starts with its own stat spread and signature items, so lean into whatever that build is strongest at and shore up its weakness with shop purchases between waves. Lower the Danger level if you are struggling — the win still counts.

Win a run with Creature in The Abyss. The Abyss is one of Brotato's alternate run modes, unlocked as you progress; select it from the difficulty/mode options before starting a run. Pick Creature, then survive every wave through to the end of the run. Each character starts with its own stat spread and signature items, so lean into whatever that build is strongest at and shore up its weakness with shop purchases between waves. Lower the Danger level if you are struggling — the win still counts.

Win a run with Beast Master. Select the Beast Master character and survive to the end of the run on any Danger level. If a specific character win is giving you trouble, drop the Danger level — the win still unlocks.

Win a run with Mage in The Abyss. The Abyss is one of Brotato's alternate run modes, unlocked as you progress; select it from the difficulty/mode options before starting a run. Pick Mage, then survive every wave through to the end of the run. Each character starts with its own stat spread and signature items, so lean into whatever that build is strongest at and shore up its weakness with shop purchases between waves. Lower the Danger level if you are struggling — the win still counts.

Win a run with Lucky in The Abyss. The Abyss is one of Brotato's alternate run modes, unlocked as you progress; select it from the difficulty/mode options before starting a run. Pick Lucky, then survive every wave through to the end of the run. Each character starts with its own stat spread and signature items, so lean into whatever that build is strongest at and shore up its weakness with shop purchases between waves. Lower the Danger level if you are struggling — the win still counts.

Win a run with Well-Rounded in The Abyss. The Abyss is one of Brotato's alternate run modes, unlocked as you progress; select it from the difficulty/mode options before starting a run. Pick Well-Rounded, then survive every wave through to the end of the run. Each character starts with its own stat spread and signature items, so lean into whatever that build is strongest at and shore up its weakness with shop purchases between waves. Lower the Danger level if you are struggling — the win still counts.

Win a run with Ranger in The Abyss. The Abyss is one of Brotato's alternate run modes, unlocked as you progress; select it from the difficulty/mode options before starting a run. Pick Ranger, then survive every wave through to the end of the run. Each character starts with its own stat spread and signature items, so lean into whatever that build is strongest at and shore up its weakness with shop purchases between waves. Lower the Danger level if you are struggling — the win still counts.

Win a run with Buccaneer in Crash Zone. Crash Zone is one of Brotato's alternate run modes, unlocked as you progress; select it from the difficulty/mode options before starting a run. Pick Buccaneer, then survive every wave through to the end of the run. Each character starts with its own stat spread and signature items, so lean into whatever that build is strongest at and shore up its weakness with shop purchases between waves. Lower the Danger level if you are struggling — the win still counts.
Win a run with Bull in The Abyss. The Abyss is one of Brotato's alternate run modes, unlocked as you progress; select it from the difficulty/mode options before starting a run. Pick Bull, then survive every wave through to the end of the run. Each character starts with its own stat spread and signature items, so lean into whatever that build is strongest at and shore up its weakness with shop purchases between waves. Lower the Danger level if you are struggling — the win still counts.

Win a run with Brawler in The Abyss. The Abyss is one of Brotato's alternate run modes, unlocked as you progress; select it from the difficulty/mode options before starting a run. Pick Brawler, then survive every wave through to the end of the run. Each character starts with its own stat spread and signature items, so lean into whatever that build is strongest at and shore up its weakness with shop purchases between waves. Lower the Danger level if you are struggling — the win still counts.

Win a run with Druid in Crash Zone. Crash Zone is one of Brotato's alternate run modes, unlocked as you progress; select it from the difficulty/mode options before starting a run. Pick Druid, then survive every wave through to the end of the run. Each character starts with its own stat spread and signature items, so lean into whatever that build is strongest at and shore up its weakness with shop purchases between waves. Lower the Danger level if you are struggling — the win still counts.

Win a run with Engineer in The Abyss. The Abyss is one of Brotato's alternate run modes, unlocked as you progress; select it from the difficulty/mode options before starting a run. Pick Engineer, then survive every wave through to the end of the run. Each character starts with its own stat spread and signature items, so lean into whatever that build is strongest at and shore up its weakness with shop purchases between waves. Lower the Danger level if you are struggling — the win still counts.

Win a run with Ogre in Crash Zone. Crash Zone is one of Brotato's alternate run modes, unlocked as you progress; select it from the difficulty/mode options before starting a run. Pick Ogre, then survive every wave through to the end of the run. Each character starts with its own stat spread and signature items, so lean into whatever that build is strongest at and shore up its weakness with shop purchases between waves. Lower the Danger level if you are struggling — the win still counts.

Win a run with Loud in The Abyss. The Abyss is one of Brotato's alternate run modes, unlocked as you progress; select it from the difficulty/mode options before starting a run. Pick Loud, then survive every wave through to the end of the run. Each character starts with its own stat spread and signature items, so lean into whatever that build is strongest at and shore up its weakness with shop purchases between waves. Lower the Danger level if you are struggling — the win still counts.

Win a run with Sailor in The Abyss. The Abyss is one of Brotato's alternate run modes, unlocked as you progress; select it from the difficulty/mode options before starting a run. Pick Sailor, then survive every wave through to the end of the run. Each character starts with its own stat spread and signature items, so lean into whatever that build is strongest at and shore up its weakness with shop purchases between waves. Lower the Danger level if you are struggling — the win still counts.

Win a run with Curious in Crash Zone. Crash Zone is one of Brotato's alternate run modes, unlocked as you progress; select it from the difficulty/mode options before starting a run. Pick Curious, then survive every wave through to the end of the run. Each character starts with its own stat spread and signature items, so lean into whatever that build is strongest at and shore up its weakness with shop purchases between waves. Lower the Danger level if you are struggling — the win still counts.

Win a run with Diver in Crash Zone. Crash Zone is one of Brotato's alternate run modes, unlocked as you progress; select it from the difficulty/mode options before starting a run. Pick Diver, then survive every wave through to the end of the run. Each character starts with its own stat spread and signature items, so lean into whatever that build is strongest at and shore up its weakness with shop purchases between waves. Lower the Danger level if you are struggling — the win still counts.

Win a run with Crazy in The Abyss. The Abyss is one of Brotato's alternate run modes, unlocked as you progress; select it from the difficulty/mode options before starting a run. Pick Crazy, then survive every wave through to the end of the run. Each character starts with its own stat spread and signature items, so lean into whatever that build is strongest at and shore up its weakness with shop purchases between waves. Lower the Danger level if you are struggling — the win still counts.

Win a run with Mutant in The Abyss. The Abyss is one of Brotato's alternate run modes, unlocked as you progress; select it from the difficulty/mode options before starting a run. Pick Mutant, then survive every wave through to the end of the run. Each character starts with its own stat spread and signature items, so lean into whatever that build is strongest at and shore up its weakness with shop purchases between waves. Lower the Danger level if you are struggling — the win still counts.

Win a run with Builder in The Abyss. The Abyss is one of Brotato's alternate run modes, unlocked as you progress; select it from the difficulty/mode options before starting a run. Pick Builder, then survive every wave through to the end of the run. Each character starts with its own stat spread and signature items, so lean into whatever that build is strongest at and shore up its weakness with shop purchases between waves. Lower the Danger level if you are struggling — the win still counts.

Win a run with King in The Abyss. The Abyss is one of Brotato's alternate run modes, unlocked as you progress; select it from the difficulty/mode options before starting a run. Pick King, then survive every wave through to the end of the run. Each character starts with its own stat spread and signature items, so lean into whatever that build is strongest at and shore up its weakness with shop purchases between waves. Lower the Danger level if you are struggling — the win still counts.

Win a run with Demon in The Abyss. The Abyss is one of Brotato's alternate run modes, unlocked as you progress; select it from the difficulty/mode options before starting a run. Pick Demon, then survive every wave through to the end of the run. Each character starts with its own stat spread and signature items, so lean into whatever that build is strongest at and shore up its weakness with shop purchases between waves. Lower the Danger level if you are struggling — the win still counts.

Win a run with Hiker in Crash Zone. Crash Zone is one of Brotato's alternate run modes, unlocked as you progress; select it from the difficulty/mode options before starting a run. Pick Hiker, then survive every wave through to the end of the run. Each character starts with its own stat spread and signature items, so lean into whatever that build is strongest at and shore up its weakness with shop purchases between waves. Lower the Danger level if you are struggling — the win still counts.

Win a run with Multitasker in The Abyss. The Abyss is one of Brotato's alternate run modes, unlocked as you progress; select it from the difficulty/mode options before starting a run. Pick Multitasker, then survive every wave through to the end of the run. Each character starts with its own stat spread and signature items, so lean into whatever that build is strongest at and shore up its weakness with shop purchases between waves. Lower the Danger level if you are struggling — the win still counts.

Win a run with Baby in The Abyss. The Abyss is one of Brotato's alternate run modes, unlocked as you progress; select it from the difficulty/mode options before starting a run. Pick Baby, then survive every wave through to the end of the run. Each character starts with its own stat spread and signature items, so lean into whatever that build is strongest at and shore up its weakness with shop purchases between waves. Lower the Danger level if you are struggling — the win still counts.

Win a run with Captain in Crash Zone. Crash Zone is one of Brotato's alternate run modes, unlocked as you progress; select it from the difficulty/mode options before starting a run. Pick Captain, then survive every wave through to the end of the run. Each character starts with its own stat spread and signature items, so lean into whatever that build is strongest at and shore up its weakness with shop purchases between waves. Lower the Danger level if you are struggling — the win still counts.

Win a run with Ghost in The Abyss. The Abyss is one of Brotato's alternate run modes, unlocked as you progress; select it from the difficulty/mode options before starting a run. Pick Ghost, then survive every wave through to the end of the run. Each character starts with its own stat spread and signature items, so lean into whatever that build is strongest at and shore up its weakness with shop purchases between waves. Lower the Danger level if you are struggling — the win still counts.

Win a run with Gangster in Crash Zone. Crash Zone is one of Brotato's alternate run modes, unlocked as you progress; select it from the difficulty/mode options before starting a run. Pick Gangster, then survive every wave through to the end of the run. Each character starts with its own stat spread and signature items, so lean into whatever that build is strongest at and shore up its weakness with shop purchases between waves. Lower the Danger level if you are struggling — the win still counts.

Win a run with Doctor in The Abyss. The Abyss is one of Brotato's alternate run modes, unlocked as you progress; select it from the difficulty/mode options before starting a run. Pick Doctor, then survive every wave through to the end of the run. Each character starts with its own stat spread and signature items, so lean into whatever that build is strongest at and shore up its weakness with shop purchases between waves. Lower the Danger level if you are struggling — the win still counts.

Win a run with Chef in Crash Zone. Crash Zone is one of Brotato's alternate run modes, unlocked as you progress; select it from the difficulty/mode options before starting a run. Pick Chef, then survive every wave through to the end of the run. Each character starts with its own stat spread and signature items, so lean into whatever that build is strongest at and shore up its weakness with shop purchases between waves. Lower the Danger level if you are struggling — the win still counts.

Win a run with Buccaneer in The Abyss. The Abyss is one of Brotato's alternate run modes, unlocked as you progress; select it from the difficulty/mode options before starting a run. Pick Buccaneer, then survive every wave through to the end of the run. Each character starts with its own stat spread and signature items, so lean into whatever that build is strongest at and shore up its weakness with shop purchases between waves. Lower the Danger level if you are struggling — the win still counts.

Win a run with Hunter in The Abyss. The Abyss is one of Brotato's alternate run modes, unlocked as you progress; select it from the difficulty/mode options before starting a run. Pick Hunter, then survive every wave through to the end of the run. Each character starts with its own stat spread and signature items, so lean into whatever that build is strongest at and shore up its weakness with shop purchases between waves. Lower the Danger level if you are struggling — the win still counts.

Win a run with Lich in The Abyss. The Abyss is one of Brotato's alternate run modes, unlocked as you progress; select it from the difficulty/mode options before starting a run. Pick Lich, then survive every wave through to the end of the run. Each character starts with its own stat spread and signature items, so lean into whatever that build is strongest at and shore up its weakness with shop purchases between waves. Lower the Danger level if you are struggling — the win still counts.

Win a run with Knight in The Abyss. The Abyss is one of Brotato's alternate run modes, unlocked as you progress; select it from the difficulty/mode options before starting a run. Pick Knight, then survive every wave through to the end of the run. Each character starts with its own stat spread and signature items, so lean into whatever that build is strongest at and shore up its weakness with shop purchases between waves. Lower the Danger level if you are struggling — the win still counts.

Win a run with Technomage in The Abyss. The Abyss is one of Brotato's alternate run modes, unlocked as you progress; select it from the difficulty/mode options before starting a run. Pick Technomage, then survive every wave through to the end of the run. Each character starts with its own stat spread and signature items, so lean into whatever that build is strongest at and shore up its weakness with shop purchases between waves. Lower the Danger level if you are struggling — the win still counts.

Win a run with Druid in The Abyss. The Abyss is one of Brotato's alternate run modes, unlocked as you progress; select it from the difficulty/mode options before starting a run. Pick Druid, then survive every wave through to the end of the run. Each character starts with its own stat spread and signature items, so lean into whatever that build is strongest at and shore up its weakness with shop purchases between waves. Lower the Danger level if you are struggling — the win still counts.

Win a run with Dwarf in Crash Zone. Crash Zone is one of Brotato's alternate run modes, unlocked as you progress; select it from the difficulty/mode options before starting a run. Pick Dwarf, then survive every wave through to the end of the run. Each character starts with its own stat spread and signature items, so lean into whatever that build is strongest at and shore up its weakness with shop purchases between waves. Lower the Danger level if you are struggling — the win still counts.

Win a run in Nightmare. Nightmare is the toughest run modifier — expect relentless pressure. Bring a proven, well-scaled build (strong single-stat scaling with enough Dodge/HP to survive), and manage the shop economy tightly between waves.

Win a run with Romantic in Crash Zone. Crash Zone is one of Brotato's alternate run modes, unlocked as you progress; select it from the difficulty/mode options before starting a run. Pick Romantic, then survive every wave through to the end of the run. Each character starts with its own stat spread and signature items, so lean into whatever that build is strongest at and shore up its weakness with shop purchases between waves. Lower the Danger level if you are struggling — the win still counts.

Win a run with Chunky in The Abyss. The Abyss is one of Brotato's alternate run modes, unlocked as you progress; select it from the difficulty/mode options before starting a run. Pick Chunky, then survive every wave through to the end of the run. Each character starts with its own stat spread and signature items, so lean into whatever that build is strongest at and shore up its weakness with shop purchases between waves. Lower the Danger level if you are struggling — the win still counts.

Win a run with Soldier in The Abyss. The Abyss is one of Brotato's alternate run modes, unlocked as you progress; select it from the difficulty/mode options before starting a run. Pick Soldier, then survive every wave through to the end of the run. Each character starts with its own stat spread and signature items, so lean into whatever that build is strongest at and shore up its weakness with shop purchases between waves. Lower the Danger level if you are struggling — the win still counts.
Win a run with Ogre in The Abyss. The Abyss is one of Brotato's alternate run modes, unlocked as you progress; select it from the difficulty/mode options before starting a run. Pick Ogre, then survive every wave through to the end of the run. Each character starts with its own stat spread and signature items, so lean into whatever that build is strongest at and shore up its weakness with shop purchases between waves. Lower the Danger level if you are struggling — the win still counts.

Win a run with Farmer in The Abyss. The Abyss is one of Brotato's alternate run modes, unlocked as you progress; select it from the difficulty/mode options before starting a run. Pick Farmer, then survive every wave through to the end of the run. Each character starts with its own stat spread and signature items, so lean into whatever that build is strongest at and shore up its weakness with shop purchases between waves. Lower the Danger level if you are struggling — the win still counts.

Win a run with One-Armed in The Abyss. The Abyss is one of Brotato's alternate run modes, unlocked as you progress; select it from the difficulty/mode options before starting a run. Pick One-Armed, then survive every wave through to the end of the run. Each character starts with its own stat spread and signature items, so lean into whatever that build is strongest at and shore up its weakness with shop purchases between waves. Lower the Danger level if you are struggling — the win still counts.

Win a run with Old in The Abyss. The Abyss is one of Brotato's alternate run modes, unlocked as you progress; select it from the difficulty/mode options before starting a run. Pick Old, then survive every wave through to the end of the run. Each character starts with its own stat spread and signature items, so lean into whatever that build is strongest at and shore up its weakness with shop purchases between waves. Lower the Danger level if you are struggling — the win still counts.

Win a run with Diver in The Abyss. The Abyss is one of Brotato's alternate run modes, unlocked as you progress; select it from the difficulty/mode options before starting a run. Pick Diver, then survive every wave through to the end of the run. Each character starts with its own stat spread and signature items, so lean into whatever that build is strongest at and shore up its weakness with shop purchases between waves. Lower the Danger level if you are struggling — the win still counts.

Win a run with Renegade in The Abyss. The Abyss is one of Brotato's alternate run modes, unlocked as you progress; select it from the difficulty/mode options before starting a run. Pick Renegade, then survive every wave through to the end of the run. Each character starts with its own stat spread and signature items, so lean into whatever that build is strongest at and shore up its weakness with shop purchases between waves. Lower the Danger level if you are struggling — the win still counts.

Win a run with Masochist in The Abyss. The Abyss is one of Brotato's alternate run modes, unlocked as you progress; select it from the difficulty/mode options before starting a run. Pick Masochist, then survive every wave through to the end of the run. Each character starts with its own stat spread and signature items, so lean into whatever that build is strongest at and shore up its weakness with shop purchases between waves. Lower the Danger level if you are struggling — the win still counts.

Win a run with Hiker in The Abyss. The Abyss is one of Brotato's alternate run modes, unlocked as you progress; select it from the difficulty/mode options before starting a run. Pick Hiker, then survive every wave through to the end of the run. Each character starts with its own stat spread and signature items, so lean into whatever that build is strongest at and shore up its weakness with shop purchases between waves. Lower the Danger level if you are struggling — the win still counts.

Win a run with Explorer in The Abyss. The Abyss is one of Brotato's alternate run modes, unlocked as you progress; select it from the difficulty/mode options before starting a run. Pick Explorer, then survive every wave through to the end of the run. Each character starts with its own stat spread and signature items, so lean into whatever that build is strongest at and shore up its weakness with shop purchases between waves. Lower the Danger level if you are struggling — the win still counts.

Win a run with Artificer in The Abyss. The Abyss is one of Brotato's alternate run modes, unlocked as you progress; select it from the difficulty/mode options before starting a run. Pick Artificer, then survive every wave through to the end of the run. Each character starts with its own stat spread and signature items, so lean into whatever that build is strongest at and shore up its weakness with shop purchases between waves. Lower the Danger level if you are struggling — the win still counts.

Win a run with Cyborg in The Abyss. The Abyss is one of Brotato's alternate run modes, unlocked as you progress; select it from the difficulty/mode options before starting a run. Pick Cyborg, then survive every wave through to the end of the run. Each character starts with its own stat spread and signature items, so lean into whatever that build is strongest at and shore up its weakness with shop purchases between waves. Lower the Danger level if you are struggling — the win still counts.

Win a run with Entrepreneur in The Abyss. The Abyss is one of Brotato's alternate run modes, unlocked as you progress; select it from the difficulty/mode options before starting a run. Pick Entrepreneur, then survive every wave through to the end of the run. Each character starts with its own stat spread and signature items, so lean into whatever that build is strongest at and shore up its weakness with shop purchases between waves. Lower the Danger level if you are struggling — the win still counts.

Win a run with Pacifist in The Abyss. The Abyss is one of Brotato's alternate run modes, unlocked as you progress; select it from the difficulty/mode options before starting a run. Pick Pacifist, then survive every wave through to the end of the run. Each character starts with its own stat spread and signature items, so lean into whatever that build is strongest at and shore up its weakness with shop purchases between waves. Lower the Danger level if you are struggling — the win still counts.

Win a run with Streamer in The Abyss. The Abyss is one of Brotato's alternate run modes, unlocked as you progress; select it from the difficulty/mode options before starting a run. Pick Streamer, then survive every wave through to the end of the run. Each character starts with its own stat spread and signature items, so lean into whatever that build is strongest at and shore up its weakness with shop purchases between waves. Lower the Danger level if you are struggling — the win still counts.

Win a run with Golem in The Abyss. The Abyss is one of Brotato's alternate run modes, unlocked as you progress; select it from the difficulty/mode options before starting a run. Pick Golem, then survive every wave through to the end of the run. Each character starts with its own stat spread and signature items, so lean into whatever that build is strongest at and shore up its weakness with shop purchases between waves. Lower the Danger level if you are struggling — the win still counts.

Win a run with Curious in The Abyss. The Abyss is one of Brotato's alternate run modes, unlocked as you progress; select it from the difficulty/mode options before starting a run. Pick Curious, then survive every wave through to the end of the run. Each character starts with its own stat spread and signature items, so lean into whatever that build is strongest at and shore up its weakness with shop purchases between waves. Lower the Danger level if you are struggling — the win still counts.

Win a run with Generalist in The Abyss. The Abyss is one of Brotato's alternate run modes, unlocked as you progress; select it from the difficulty/mode options before starting a run. Pick Generalist, then survive every wave through to the end of the run. Each character starts with its own stat spread and signature items, so lean into whatever that build is strongest at and shore up its weakness with shop purchases between waves. Lower the Danger level if you are struggling — the win still counts.

Win a run with Speedy in The Abyss. The Abyss is one of Brotato's alternate run modes, unlocked as you progress; select it from the difficulty/mode options before starting a run. Pick Speedy, then survive every wave through to the end of the run. Each character starts with its own stat spread and signature items, so lean into whatever that build is strongest at and shore up its weakness with shop purchases between waves. Lower the Danger level if you are struggling — the win still counts.

Win a run with Jack in The Abyss. The Abyss is one of Brotato's alternate run modes, unlocked as you progress; select it from the difficulty/mode options before starting a run. Pick Jack, then survive every wave through to the end of the run. Each character starts with its own stat spread and signature items, so lean into whatever that build is strongest at and shore up its weakness with shop purchases between waves. Lower the Danger level if you are struggling — the win still counts.

Win a run with Saver in The Abyss. The Abyss is one of Brotato's alternate run modes, unlocked as you progress; select it from the difficulty/mode options before starting a run. Pick Saver, then survive every wave through to the end of the run. Each character starts with its own stat spread and signature items, so lean into whatever that build is strongest at and shore up its weakness with shop purchases between waves. Lower the Danger level if you are struggling — the win still counts.

Win a run with Glutton in The Abyss. The Abyss is one of Brotato's alternate run modes, unlocked as you progress; select it from the difficulty/mode options before starting a run. Pick Glutton, then survive every wave through to the end of the run. Each character starts with its own stat spread and signature items, so lean into whatever that build is strongest at and shore up its weakness with shop purchases between waves. Lower the Danger level if you are struggling — the win still counts.

Win a run with Captain in The Abyss. The Abyss is one of Brotato's alternate run modes, unlocked as you progress; select it from the difficulty/mode options before starting a run. Pick Captain, then survive every wave through to the end of the run. Each character starts with its own stat spread and signature items, so lean into whatever that build is strongest at and shore up its weakness with shop purchases between waves. Lower the Danger level if you are struggling — the win still counts.

Win a run with Gangster in The Abyss. The Abyss is one of Brotato's alternate run modes, unlocked as you progress; select it from the difficulty/mode options before starting a run. Pick Gangster, then survive every wave through to the end of the run. Each character starts with its own stat spread and signature items, so lean into whatever that build is strongest at and shore up its weakness with shop purchases between waves. Lower the Danger level if you are struggling — the win still counts.

Win a run with Apprentice in The Abyss. The Abyss is one of Brotato's alternate run modes, unlocked as you progress; select it from the difficulty/mode options before starting a run. Pick Apprentice, then survive every wave through to the end of the run. Each character starts with its own stat spread and signature items, so lean into whatever that build is strongest at and shore up its weakness with shop purchases between waves. Lower the Danger level if you are struggling — the win still counts.

Win a run with Vampire in The Abyss. The Abyss is one of Brotato's alternate run modes, unlocked as you progress; select it from the difficulty/mode options before starting a run. Pick Vampire, then survive every wave through to the end of the run. Each character starts with its own stat spread and signature items, so lean into whatever that build is strongest at and shore up its weakness with shop purchases between waves. Lower the Danger level if you are struggling — the win still counts.

Win a run with Wildling in The Abyss. The Abyss is one of Brotato's alternate run modes, unlocked as you progress; select it from the difficulty/mode options before starting a run. Pick Wildling, then survive every wave through to the end of the run. Each character starts with its own stat spread and signature items, so lean into whatever that build is strongest at and shore up its weakness with shop purchases between waves. Lower the Danger level if you are struggling — the win still counts.

Win a run with Gladiator in The Abyss. The Abyss is one of Brotato's alternate run modes, unlocked as you progress; select it from the difficulty/mode options before starting a run. Pick Gladiator, then survive every wave through to the end of the run. Each character starts with its own stat spread and signature items, so lean into whatever that build is strongest at and shore up its weakness with shop purchases between waves. Lower the Danger level if you are struggling — the win still counts.

Win a run with Sick in The Abyss. The Abyss is one of Brotato's alternate run modes, unlocked as you progress; select it from the difficulty/mode options before starting a run. Pick Sick, then survive every wave through to the end of the run. Each character starts with its own stat spread and signature items, so lean into whatever that build is strongest at and shore up its weakness with shop purchases between waves. Lower the Danger level if you are struggling — the win still counts.

Win a run with Chef in The Abyss. The Abyss is one of Brotato's alternate run modes, unlocked as you progress; select it from the difficulty/mode options before starting a run. Pick Chef, then survive every wave through to the end of the run. Each character starts with its own stat spread and signature items, so lean into whatever that build is strongest at and shore up its weakness with shop purchases between waves. Lower the Danger level if you are struggling — the win still counts.

Win a run with Fisherman in The Abyss. The Abyss is one of Brotato's alternate run modes, unlocked as you progress; select it from the difficulty/mode options before starting a run. Pick Fisherman, then survive every wave through to the end of the run. Each character starts with its own stat spread and signature items, so lean into whatever that build is strongest at and shore up its weakness with shop purchases between waves. Lower the Danger level if you are struggling — the win still counts.

Win a run with Vagabond in The Abyss. The Abyss is one of Brotato's alternate run modes, unlocked as you progress; select it from the difficulty/mode options before starting a run. Pick Vagabond, then survive every wave through to the end of the run. Each character starts with its own stat spread and signature items, so lean into whatever that build is strongest at and shore up its weakness with shop purchases between waves. Lower the Danger level if you are struggling — the win still counts.

Win a run with Cryptid in The Abyss. The Abyss is one of Brotato's alternate run modes, unlocked as you progress; select it from the difficulty/mode options before starting a run. Pick Cryptid, then survive every wave through to the end of the run. Each character starts with its own stat spread and signature items, so lean into whatever that build is strongest at and shore up its weakness with shop purchases between waves. Lower the Danger level if you are struggling — the win still counts.

Win a run with Dwarf in The Abyss. The Abyss is one of Brotato's alternate run modes, unlocked as you progress; select it from the difficulty/mode options before starting a run. Pick Dwarf, then survive every wave through to the end of the run. Each character starts with its own stat spread and signature items, so lean into whatever that build is strongest at and shore up its weakness with shop purchases between waves. Lower the Danger level if you are struggling — the win still counts.

Win a run with Romantic in The Abyss. The Abyss is one of Brotato's alternate run modes, unlocked as you progress; select it from the difficulty/mode options before starting a run. Pick Romantic, then survive every wave through to the end of the run. Each character starts with its own stat spread and signature items, so lean into whatever that build is strongest at and shore up its weakness with shop purchases between waves. Lower the Danger level if you are struggling — the win still counts.

Win a run with Arms Dealer in The Abyss. The Abyss is one of Brotato's alternate run modes, unlocked as you progress; select it from the difficulty/mode options before starting a run. Pick Arms Dealer, then survive every wave through to the end of the run. Each character starts with its own stat spread and signature items, so lean into whatever that build is strongest at and shore up its weakness with shop purchases between waves. Lower the Danger level if you are struggling — the win still counts.

Win a run with Wounded. Wounded starts at very low HP, so survivability is the whole challenge — prioritise HP, HP Regeneration, Life Steal and Dodge, and keep your distance. Lower the Danger level if needed; the win still counts.