
A lot of this list is single-run conditions that don’t conflict with each other, so you can earn several at once instead of replaying for each. Each plan below is one run. Achievements in a plan are marked with a ⛓ badge further down.
Play Tempest Dynasty on a big, resource-rich map against a passive AI and do not end the match once you could win. Every achievement here is Dynasty-only and scoped to a single match, so they all land in the same game.
- ✓▢Cloudy with a Chance of Explosions — Use the Commando's Airstrike ability 10 times in one mission or match
- ✓▢Not a step back! — 'Inspire' 25 units with the Line Officer at once in one mission or match
- ✓▢Hovering Hammer of Doom — Use the Leveler's 'Barrage' ability 30 times in one mission or match
- ✓▢Reduce, Reuse, Recycle! — Salvage' 25 vehicles from the Salvage Center in one mission or match
- ✓▢Tempest Hoarder — Produce 15 Tempest Rigs in one mission or match
- ✓▢High Voltage! — Activate Distribution Mode from two Dynasty Power Plants on one building
Rambo, Keep rollin' rollin', Road paved with bad intentions and Bug Zapper are Dynasty too but are NOT single-match capped, so they accumulate underneath this run rather than needing it.
Play GDF, same idea — big map, passive AI, long game. Intel is the real constraint: both turret achievements spend it per deployment, so expand early and do not starve yourself of it.
- ✓▢Doctor's Visit — Deploy the Riot Medic's 'Healing Turret' 10 times in one mission or match
- ✓▢Drive By Mechanic — Deploy the Shieldmaiden's 'Repair Turret' 20 times in one mission or match
- ✓▢Firewatch — Use the Engineer to deploy 10 Guard Towers in one mission or match
- ✓▢Marked for Death — Kill 50 Intel Marked enemy units with 'Networked' units in one mission or match
- ✓▢Marked for life — Intel Mark 98 units over one mission or match
- ✓▢You Can't See Me — Have 25 Units be Invisible at one time
- ✓▢Squatters Rights — Capture 15 enemy buildings with either Engineers or Technicians in one mission or match
- ✓▢What's mine is mine, what's yours is now mine too — Use the Hijacker's 'Override' ability 5 times over the course of a mission or match
The Hijacker is a GDF specialist, not a Dynasty one — easy to get backwards. It also sits behind the full tech tree and is limited to one at a time, so tech up and keep it alive.
Both of these need you on Dynasty AND the enemy on GDF — set the AI's faction deliberately. Ignitor Corps and Missile Troopers are Dynasty; Field Scouts and Combat Drones are GDF, so a Dynasty AI opponent makes both impossible.
- ✓▢Western BBQ — Kill 25 Field Scout units with Ignitor units in one mission or match
- ✓▢Clay Pigeons — Destroy 100 Combat Drones with Missile Troopers in one mission or match
This is the one people get stuck on: it is not a faction requirement, it is a MATCHUP requirement. Community guides note the GDF can also hire Missile Troopers from a Mercenary Camp, so Clay Pigeons has a GDF-vs-GDF route as well — Western BBQ does not.
No faction requirement on any of these, so play whichever side you prefer. Bank a large credit reserve, then queue everything at once — the construction sites you start for the silos and air pads are the same ten sites Multitasker counts.
- ✓▢Multitasker — Have 10 Construction Sites active at one time
- ✓▢The Ultimate Silo-fest — Construct 10 Silos in one mission or match
- ✓▢Air Traffic Controller — Construct 12 Air Pads in one mission or match
- ✓▢Fortress of Solitude — Construct 50 Concrete Walls in one mission or match
- ✓▢Base-Builder’s Fiesta — Produce 5 MCVs in one mission or match
- ✓▢Plowing the Fields — Harvest 200,000$ worth of tempest in one mission or match
- ✓▢Making Bacon Pancakes — Crush 50 infantry units by running them over with vehicles in one mission or match
Walls sit late in the tech tree, so tech toward them before committing to the run or Fortress of Solitude will not be reachable in the same match.
Set three AI opponents on the same team and use a Construction-Yard-only victory condition so you only have to destroy their yards rather than out-fight three armies. Pick the faction and difficulty that matches the skirmish achievement you still need.
- ✓▢Last Man Standing — Win a Skirmish Match against 3 AI Players that are on the same team
- ✓▢Live Fire Exercise — Beat the Skirmish AI on "Hard" while playing as GDF
- ✓▢Academy of War — Beat the Skirmish AI on "Hard" while playing as Dynasty
Live Fire Exercise is Hard-as-GDF and Academy of War is Hard-as-Dynasty, so those two need separate runs from each other — but each can be the same match as Last Man Standing. Whether a Hard win also awards the Easy and Normal versions is NOT verified, so don't assume it.

GDF campaign. Story progress — finish the mission on any difficulty and it unlocks. Unmissable if you complete the campaign.
There is a matching + achievement for the same mission that additionally requires every secondary objective, so it is worth doing both in the same attempt rather than replaying later.

GDF campaign. The + variant needs every secondary objective in the mission as well as the main one.
Secondary objectives are listed in the objectives panel and several can be failed permanently by pushing the main objective too fast, so read them before you advance. If you miss one, restart the mission from the briefing screen rather than reloading a mid-mission save — community reports say a mid-mission load can leave the achievement unable to fire.
We have not documented this mission's specific secondaries; check the in-game objectives list.

GDF campaign. Story progress — finish the mission on any difficulty and it unlocks. Unmissable if you complete the campaign.
There is a matching + achievement for the same mission that additionally requires every secondary objective, so it is worth doing both in the same attempt rather than replaying later.

Faction: GDF. Intel and Networked units are the GDF's mechanic, so this is a GDF match. Mark targets, then make sure the killing blow comes from a Networked unit rather than anything else — kills from non-Networked units do not count toward the 50.
Because it is scoped to one match, give yourself a long game: a big map against a passive AI lets you mark and kill at your own pace instead of racing. It pairs directly with Marked for life, which counts the marking rather than the killing, so run them together.
Faction: GDF. The companion to Marked for Death — this one counts the marks themselves, not the kills, so every unit you mark contributes whether or not it dies to a Networked unit.
Mark everything you see, including units you have no intention of engaging. A long GDF match against an AI that keeps producing gives you a renewable supply of things to mark.

GDF campaign. The + variant needs every secondary objective in the mission as well as the main one.
Secondary objectives are listed in the objectives panel and several can be failed permanently by pushing the main objective too fast, so read them before you advance. If you miss one, restart the mission from the briefing screen rather than reloading a mid-mission save — community reports say a mid-mission load can leave the achievement unable to fire.
We have not documented this mission's specific secondaries; check the in-game objectives list.

GDF campaign. Story progress — finish the mission on any difficulty and it unlocks. Unmissable if you complete the campaign.
There is a matching + achievement for the same mission that additionally requires every secondary objective, so it is worth doing both in the same attempt rather than replaying later.

GDF campaign. Story progress — finish the mission on any difficulty and it unlocks. Unmissable if you complete the campaign.
There is a matching + achievement for the same mission that additionally requires every secondary objective, so it is worth doing both in the same attempt rather than replaying later.

Tempest Dynasty campaign. Story progress — finish the mission on any difficulty and it unlocks. Unmissable if you complete the campaign.
There is a matching + achievement for the same mission that additionally requires every secondary objective, so it is worth doing both in the same attempt rather than replaying later.

GDF campaign. The + variant needs every secondary objective in the mission as well as the main one.
Secondary objectives are listed in the objectives panel and several can be failed permanently by pushing the main objective too fast, so read them before you advance. If you miss one, restart the mission from the briefing screen rather than reloading a mid-mission save — community reports say a mid-mission load can leave the achievement unable to fire.
We have not documented this mission's specific secondaries; check the in-game objectives list.

Either faction. Purely an economic total inside a single match, with no faction requirement — the GDF Harvester and the Dynasty Tempest Rig both count.
The practical approach is a long game on a resource-rich map: build extra harvesters early, expand to a second Tempest field, and simply do not end the match once you could win. It folds neatly into any other long economic run.
GDF campaign. The + variant needs every secondary objective in the mission as well as the main one.
Secondary objectives are listed in the objectives panel and several can be failed permanently by pushing the main objective too fast, so read them before you advance. If you miss one, restart the mission from the briefing screen rather than reloading a mid-mission save — community reports say a mid-mission load can leave the achievement unable to fire.
We have not documented this mission's specific secondaries; check the in-game objectives list.
Either faction. A simultaneous state, not a total, so you need ten things under construction at the same moment. Bank a large credit reserve first, then queue everything at once.
Community guides point out that cheap repeatable structures are the easiest way to fill the ten slots, which is why this sits naturally alongside The Ultimate Silo-fest and Air Traffic Controller — the buildings you queue for those can be the same ten sites.

GDF campaign. Story progress — finish the mission on any difficulty and it unlocks. Unmissable if you complete the campaign.
There is a matching + achievement for the same mission that additionally requires every secondary objective, so it is worth doing both in the same attempt rather than replaying later.

Tempest Dynasty campaign. Story progress — finish the mission on any difficulty and it unlocks. Unmissable if you complete the campaign.
There is a matching + achievement for the same mission that additionally requires every secondary objective, so it is worth doing both in the same attempt rather than replaying later.

This one needs a specific matchup. Ignitor Corps are Tempest Dynasty infantry and Field Scouts are GDF infantry — so you must play Dynasty against a GDF opponent. Setting the AI to Dynasty makes this impossible, which is the usual reason people cannot get it to trigger.
Field Scouts are cheap early-game GDF infantry, so an AI that keeps producing them gives you a steady supply. Keep a group of Ignitors alive and let them get the kills.

GDF campaign. Story progress — finish the mission on any difficulty and it unlocks. Unmissable if you complete the campaign.
There is a matching + achievement for the same mission that additionally requires every secondary objective, so it is worth doing both in the same attempt rather than replaying later.

GDF campaign. Story progress — finish the mission on any difficulty and it unlocks. Unmissable if you complete the campaign.
There is a matching + achievement for the same mission that additionally requires every secondary objective, so it is worth doing both in the same attempt rather than replaying later.

Faction: GDF. A simultaneous state. Community guides point to GDF stealth drones as the practical route, since you can field enough of them at once to reach 25 — infantry stealth tends to cap out well short.
Build toward mass production of the stealthed unit rather than mixing your army, then trigger stealth on all of them together and check the count before engaging anything.

Tempest Dynasty campaign. Story progress — finish the mission on any difficulty and it unlocks. Unmissable if you complete the campaign.
There is a matching + achievement for the same mission that additionally requires every secondary objective, so it is worth doing both in the same attempt rather than replaying later.

GDF campaign. Story progress — finish the mission on any difficulty and it unlocks. Unmissable if you complete the campaign.
There is a matching + achievement for the same mission that additionally requires every secondary objective, so it is worth doing both in the same attempt rather than replaying later.

GDF campaign. Story progress — finish the mission on any difficulty and it unlocks. Unmissable if you complete the campaign.
There is a matching + achievement for the same mission that additionally requires every secondary objective, so it is worth doing both in the same attempt rather than replaying later.
Either faction. Silos expand your credit capacity, so ten of them is something you would half-want anyway in a long economic game. No faction requirement.
Because construction sites count while they are building, queuing silos is also one of the cleanest ways to satisfy Multitasker in the same match — ten silos going up at once covers both.
Tempest Dynasty campaign. Story progress — finish the mission on any difficulty and it unlocks. Unmissable if you complete the campaign.
There is a matching + achievement for the same mission that additionally requires every secondary objective, so it is worth doing both in the same attempt rather than replaying later.

GDF campaign. The + variant needs every secondary objective in the mission as well as the main one.
Secondary objectives are listed in the objectives panel and several can be failed permanently by pushing the main objective too fast, so read them before you advance. If you miss one, restart the mission from the briefing screen rather than reloading a mid-mission save — community reports say a mid-mission load can leave the achievement unable to fire.
We have not documented this mission's specific secondaries; check the in-game objectives list.

GDF campaign. Story progress — finish the mission on any difficulty and it unlocks. Unmissable if you complete the campaign.
There is a matching + achievement for the same mission that additionally requires every secondary objective, so it is worth doing both in the same attempt rather than replaying later.

Tempest Dynasty campaign. The + variant needs every secondary objective in the mission as well as the main one.
Secondary objectives are listed in the objectives panel and several can be failed permanently by pushing the main objective too fast, so read them before you advance. If you miss one, restart the mission from the briefing screen rather than reloading a mid-mission save — community reports say a mid-mission load can leave the achievement unable to fire.
We have not documented this mission's specific secondaries; check the in-game objectives list.

GDF campaign. Story progress — finish the mission on any difficulty and it unlocks. Unmissable if you complete the campaign.
There is a matching + achievement for the same mission that additionally requires every secondary objective, so it is worth doing both in the same attempt rather than replaying later.

GDF campaign on Easy. Whether beating a higher difficulty also awards the lower ones is not verified — we have not confirmed it either way, so do not assume Insane hands you Easy through Hard. If you want all four tiers and cannot confirm the stacking, the safe route is to play the lowest one first and check which unlocked before committing to a full replay.
Note Deprived asks for a campaign completed without spending Doctrine or Armory points — if you intend to get it, the Easy run is the one to do it on.

GDF campaign. The + variant needs every secondary objective in the mission as well as the main one.
Secondary objectives are listed in the objectives panel and several can be failed permanently by pushing the main objective too fast, so read them before you advance. If you miss one, restart the mission from the briefing screen rather than reloading a mid-mission save — community reports say a mid-mission load can leave the achievement unable to fire.
We have not documented this mission's specific secondaries; check the in-game objectives list.

GDF campaign. The + variant needs every secondary objective in the mission as well as the main one.
Secondary objectives are listed in the objectives panel and several can be failed permanently by pushing the main objective too fast, so read them before you advance. If you miss one, restart the mission from the briefing screen rather than reloading a mid-mission save — community reports say a mid-mission load can leave the achievement unable to fire.
We have not documented this mission's specific secondaries; check the in-game objectives list.

Tempest Dynasty campaign. Story progress — finish the mission on any difficulty and it unlocks. Unmissable if you complete the campaign.
There is a matching + achievement for the same mission that additionally requires every secondary objective, so it is worth doing both in the same attempt rather than replaying later.

GDF campaign. The + variant needs every secondary objective in the mission as well as the main one.
Secondary objectives are listed in the objectives panel and several can be failed permanently by pushing the main objective too fast, so read them before you advance. If you miss one, restart the mission from the briefing screen rather than reloading a mid-mission save — community reports say a mid-mission load can leave the achievement unable to fire.
We have not documented this mission's specific secondaries; check the in-game objectives list.

Play as GDF and beat the skirmish AI on Easy. The faction is part of the requirement — the same win as the other side does not count.
Whether a Hard win also awards the Easy and Normal versions is not verified, so do not count on it.
This is worth combining: the same match can also satisfy Last Man Standing if you set three allied AI opponents, and a Construction-Yard-only victory condition keeps a 1v3 manageable. See the stacking plan at the top of this page.

Tempest Dynasty campaign. The + variant needs every secondary objective in the mission as well as the main one.
Secondary objectives are listed in the objectives panel and several can be failed permanently by pushing the main objective too fast, so read them before you advance. If you miss one, restart the mission from the briefing screen rather than reloading a mid-mission save — community reports say a mid-mission load can leave the achievement unable to fire.
We have not documented this mission's specific secondaries; check the in-game objectives list.
Tempest Dynasty campaign. Story progress — finish the mission on any difficulty and it unlocks. Unmissable if you complete the campaign.
There is a matching + achievement for the same mission that additionally requires every secondary objective, so it is worth doing both in the same attempt rather than replaying later.

Tempest Dynasty campaign. Story progress — finish the mission on any difficulty and it unlocks. Unmissable if you complete the campaign.
There is a matching + achievement for the same mission that additionally requires every secondary objective, so it is worth doing both in the same attempt rather than replaying later.

GDF campaign on Normal. Whether beating a higher difficulty also awards the lower ones is not verified — we have not confirmed it either way, so do not assume Insane hands you Easy through Hard. If you want all four tiers and cannot confirm the stacking, the safe route is to play the lowest one first and check which unlocked before committing to a full replay.
Note Deprived asks for a campaign completed without spending Doctrine or Armory points — if you intend to get it, the Easy run is the one to do it on.
Tempest Dynasty campaign. The + variant needs every secondary objective in the mission as well as the main one.
Secondary objectives are listed in the objectives panel and several can be failed permanently by pushing the main objective too fast, so read them before you advance. If you miss one, restart the mission from the briefing screen rather than reloading a mid-mission save — community reports say a mid-mission load can leave the achievement unable to fire.
We have not documented this mission's specific secondaries; check the in-game objectives list.
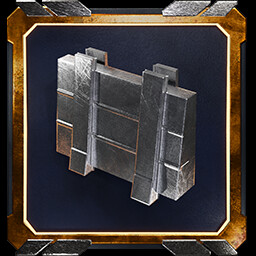
Either faction. Walls sit oddly late in the tech tree, so you cannot start spamming them from the opening minutes — plan for a long match and tech toward them before you commit.
Once unlocked they are cheap and fast, so 50 goes quickly. Any long economic game will support this alongside the other build-count achievements.

Tempest Dynasty campaign. Story progress — finish the mission on any difficulty and it unlocks. Unmissable if you complete the campaign.
There is a matching + achievement for the same mission that additionally requires every secondary objective, so it is worth doing both in the same attempt rather than replaying later.

Tempest Dynasty campaign. Story progress — finish the mission on any difficulty and it unlocks. Unmissable if you complete the campaign.
There is a matching + achievement for the same mission that additionally requires every secondary objective, so it is worth doing both in the same attempt rather than replaying later.
Tempest Dynasty campaign. The + variant needs every secondary objective in the mission as well as the main one.
Secondary objectives are listed in the objectives panel and several can be failed permanently by pushing the main objective too fast, so read them before you advance. If you miss one, restart the mission from the briefing screen rather than reloading a mid-mission save — community reports say a mid-mission load can leave the achievement unable to fire.
We have not documented this mission's specific secondaries; check the in-game objectives list.
Tempest Dynasty campaign. The + variant needs every secondary objective in the mission as well as the main one.
Secondary objectives are listed in the objectives panel and several can be failed permanently by pushing the main objective too fast, so read them before you advance. If you miss one, restart the mission from the briefing screen rather than reloading a mid-mission save — community reports say a mid-mission load can leave the achievement unable to fire.
We have not documented this mission's specific secondaries; check the in-game objectives list.

Tempest Dynasty campaign. The + variant needs every secondary objective in the mission as well as the main one.
Secondary objectives are listed in the objectives panel and several can be failed permanently by pushing the main objective too fast, so read them before you advance. If you miss one, restart the mission from the briefing screen rather than reloading a mid-mission save — community reports say a mid-mission load can leave the achievement unable to fire.
We have not documented this mission's specific secondaries; check the in-game objectives list.

GDF campaign. The + variant needs every secondary objective in the mission as well as the main one.
Secondary objectives are listed in the objectives panel and several can be failed permanently by pushing the main objective too fast, so read them before you advance. If you miss one, restart the mission from the briefing screen rather than reloading a mid-mission save — community reports say a mid-mission load can leave the achievement unable to fire.
We have not documented this mission's specific secondaries; check the in-game objectives list.

Tempest Dynasty campaign. Story progress — finish the mission on any difficulty and it unlocks. Unmissable if you complete the campaign.
There is a matching + achievement for the same mission that additionally requires every secondary objective, so it is worth doing both in the same attempt rather than replaying later.

Tempest Dynasty campaign on Easy. Whether beating a higher difficulty also awards the lower ones is not verified — we have not confirmed it either way, so do not assume Insane hands you Easy through Hard. If you want all four tiers and cannot confirm the stacking, the safe route is to play the lowest one first and check which unlocked before committing to a full replay.
Note Deprived asks for a campaign completed without spending Doctrine or Armory points — if you intend to get it, the Easy run is the one to do it on.

Tempest Dynasty campaign. Story progress — finish the mission on any difficulty and it unlocks. Unmissable if you complete the campaign.
There is a matching + achievement for the same mission that additionally requires every secondary objective, so it is worth doing both in the same attempt rather than replaying later.

Play as GDF and beat the skirmish AI on Normal. The faction is part of the requirement — the same win as the other side does not count.
Whether a Hard win also awards the Easy and Normal versions is not verified, so do not count on it.
This is worth combining: the same match can also satisfy Last Man Standing if you set three allied AI opponents, and a Construction-Yard-only victory condition keeps a 1v3 manageable. See the stacking plan at the top of this page.

Faction: GDF. The Shieldmaiden is a GDF hover vehicle, so this is a GDF match. The Repair Turret costs Intel to deploy, so the real constraint is Intel income rather than the ability itself.
Community guides recommend doing it somewhere Intel is plentiful and letting it recharge between deployments — you are not fighting a timer, only the resource.

Tempest Dynasty campaign. The + variant needs every secondary objective in the mission as well as the main one.
Secondary objectives are listed in the objectives panel and several can be failed permanently by pushing the main objective too fast, so read them before you advance. If you miss one, restart the mission from the briefing screen rather than reloading a mid-mission save — community reports say a mid-mission load can leave the achievement unable to fire.
We have not documented this mission's specific secondaries; check the in-game objectives list.

Either faction. This one is hidden and Steam does not publish a description, so the exact trigger is not verified. Judging by the name it is likely tied to simply taking part in something rather than winning it, but we are not going to guess at the specifics — check a community guide or the game's own achievement list in-game.

Tempest Dynasty campaign on Normal. Whether beating a higher difficulty also awards the lower ones is not verified — we have not confirmed it either way, so do not assume Insane hands you Easy through Hard. If you want all four tiers and cannot confirm the stacking, the safe route is to play the lowest one first and check which unlocked before committing to a full replay.
Note Deprived asks for a campaign completed without spending Doctrine or Armory points — if you intend to get it, the Easy run is the one to do it on.

Multiplayer against real opponents. Nothing here is skill-gated beyond winning, but it does need other players online, so the practical constraint is finding matches rather than the games themselves.
Community guides note that campaign and multiplayer progress are tracked separately for some achievements, so do not expect single-player work to count toward these.
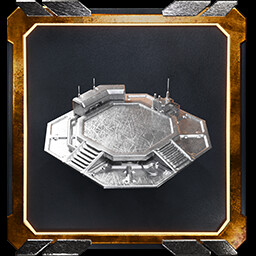
Either faction. Both factions can build Air Pads, so there is no faction requirement here. Twelve in one match is a credit problem more than anything else.
Because the pads are under construction simultaneously, this is another natural partner for Multitasker — queue a batch and you satisfy the ten-construction-sites state at the same time.
Tempest Dynasty campaign. The + variant needs every secondary objective in the mission as well as the main one.
Secondary objectives are listed in the objectives panel and several can be failed permanently by pushing the main objective too fast, so read them before you advance. If you miss one, restart the mission from the briefing screen rather than reloading a mid-mission save — community reports say a mid-mission load can leave the achievement unable to fire.
We have not documented this mission's specific secondaries; check the in-game objectives list.

Tempest Dynasty campaign. The + variant needs every secondary objective in the mission as well as the main one.
Secondary objectives are listed in the objectives panel and several can be failed permanently by pushing the main objective too fast, so read them before you advance. If you miss one, restart the mission from the briefing screen rather than reloading a mid-mission save — community reports say a mid-mission load can leave the achievement unable to fire.
We have not documented this mission's specific secondaries; check the in-game objectives list.
Play as Tempest Dynasty and beat the skirmish AI on Easy. The faction is part of the requirement — the same win as the other side does not count.
Whether a Hard win also awards the Easy and Normal versions is not verified, so do not count on it.
This is worth combining: the same match can also satisfy Last Man Standing if you set three allied AI opponents, and a Construction-Yard-only victory condition keeps a 1v3 manageable. See the stacking plan at the top of this page.

Either faction. The wording accepts either faction's capture unit — the GDF Engineer or the Dynasty Technician — so play whichever you prefer.
Fifteen buildings in one match means you want an opponent with a large base, so set a passive AI on a big map and let it build up before you start taking it apart. Capturing rather than destroying is the whole point: do not let your army kill what you are trying to steal.

Tempest Dynasty campaign. The + variant needs every secondary objective in the mission as well as the main one.
Secondary objectives are listed in the objectives panel and several can be failed permanently by pushing the main objective too fast, so read them before you advance. If you miss one, restart the mission from the briefing screen rather than reloading a mid-mission save — community reports say a mid-mission load can leave the achievement unable to fire.
We have not documented this mission's specific secondaries; check the in-game objectives list.

GDF campaign. The + variant needs every secondary objective in the mission as well as the main one.
Secondary objectives are listed in the objectives panel and several can be failed permanently by pushing the main objective too fast, so read them before you advance. If you miss one, restart the mission from the briefing screen rather than reloading a mid-mission save — community reports say a mid-mission load can leave the achievement unable to fire.
We have not documented this mission's specific secondaries; check the in-game objectives list.

Play as Tempest Dynasty and beat the skirmish AI on Normal. The faction is part of the requirement — the same win as the other side does not count.
Whether a Hard win also awards the Easy and Normal versions is not verified, so do not count on it.
This is worth combining: the same match can also satisfy Last Man Standing if you set three allied AI opponents, and a Construction-Yard-only victory condition keeps a 1v3 manageable. See the stacking plan at the top of this page.
Tempest Dynasty campaign. The + variant needs every secondary objective in the mission as well as the main one.
Secondary objectives are listed in the objectives panel and several can be failed permanently by pushing the main objective too fast, so read them before you advance. If you miss one, restart the mission from the briefing screen rather than reloading a mid-mission save — community reports say a mid-mission load can leave the achievement unable to fire.
We have not documented this mission's specific secondaries; check the in-game objectives list.

GDF campaign. The + variant needs every secondary objective in the mission as well as the main one.
Secondary objectives are listed in the objectives panel and several can be failed permanently by pushing the main objective too fast, so read them before you advance. If you miss one, restart the mission from the briefing screen rather than reloading a mid-mission save — community reports say a mid-mission load can leave the achievement unable to fire.
We have not documented this mission's specific secondaries; check the in-game objectives list.

Faction: Tempest Dynasty. The Voltaic line is Tempest Dynasty, so this is a Dynasty run. You need the perk itself, then kills specifically on units already carrying the Tempest status effect — untouched units do not count.
Apply the effect first, then let the perk do the killing. There is no single-match wording here, so the 100 accumulates across games and will tick along under any Dynasty play.
Faction: Tempest Dynasty. The Commando is a Tempest Dynasty specialist, so this is a Dynasty match. Ten uses in a single match means keeping the Commando alive rather than trading it — losing the specialist ends your run at whatever count you were on.
Community guides note you can field up to three specialists in one match, which is worth knowing if you are chasing several specialist achievements together.

Either faction. No faction requirement — you just need heavy vehicles and enemy infantry. Set an AI that produces infantry in bulk and keep a couple of high crush-tier vehicles parked in its path.
Because it is scoped to a single match, pick a long game rather than trying to squeeze it into a rush.

Faction: Tempest Dynasty. The description names the Dynasty Power Plant outright, so this is a Dynasty match. It is a positioning puzzle rather than a grind: two plants both in Distribution Mode, both feeding the same structure at the same time.
Build the two plants close enough to your target building that both can reach it before you activate.

Either faction. Cumulative across games rather than one match, and available to both factions, so this ticks along on its own as you play. Use support powers whenever they are off cooldown instead of saving them for a perfect moment.

Play as GDF and beat the skirmish AI on Hard. The faction is part of the requirement — the same win as the other side does not count.
Whether a Hard win also awards the Easy and Normal versions is not verified, so do not count on it.
This is worth combining: the same match can also satisfy Last Man Standing if you set three allied AI opponents, and a Construction-Yard-only victory condition keeps a 1v3 manageable. See the stacking plan at the top of this page.

GDF campaign on Hard. Whether beating a higher difficulty also awards the lower ones is not verified — we have not confirmed it either way, so do not assume Insane hands you Easy through Hard. If you want all four tiers and cannot confirm the stacking, the safe route is to play the lowest one first and check which unlocked before committing to a full replay.
Note Deprived asks for a campaign completed without spending Doctrine or Armory points — if you intend to get it, the Easy run is the one to do it on.

Either faction. A 1v3 with all three AI allied against you. Community guides suggest a Construction-Yard-only victory condition to make it manageable: you only have to destroy their yards rather than grind down three full armies.
This is worth combining with a difficulty achievement, since the same match can satisfy both — see the stacking plan at the top of this page.

Either faction. Cumulative rather than per-match. You need a vehicle with a high enough crush tier to drive over smaller ones — community guides point to the largest vehicles each faction has, including MCVs and the Dynasty's big hulls.
Smaller enemy cars are the targets; anything heavy will simply not be crushable.

Faction: GDF. The Riot Medic is a GDF specialist, so this is a GDF match. Like the Shieldmaiden's turret it costs Intel per deployment, so your Intel income is the limiting factor rather than any cooldown.
Keep the Medic out of combat — you need it alive for ten deployments.
Either faction. Both factions field an MCV, so no faction requirement. Five in a single match is purely a credit cost, so this wants a long economic game with a healthy harvester count behind it.
It sits comfortably in the same match as the other build-and-economy achievements.

Either faction. Cumulative across everything you play, and by a distance the longest grind on the list. Barrels are scattered around maps in both campaigns and skirmishes, so the honest advice is to shoot every one you pass rather than making a project of it.
If you want to farm it deliberately, pick maps you know are barrel-heavy and replay them.

Multiplayer against real opponents. Nothing here is skill-gated beyond winning, but it does need other players online, so the practical constraint is finding matches rather than the games themselves.
Community guides note that campaign and multiplayer progress are tracked separately for some achievements, so do not expect single-player work to count toward these.
Faction: GDF. The Engineer is the GDF's utility infantry, so this is a GDF match. Ten towers in one match is cheap and quick once you have Engineers rolling.
Since Engineers are also the GDF's capture unit, this pairs naturally with Squatters Rights in the same game.
Play as Tempest Dynasty and beat the skirmish AI on Hard. The faction is part of the requirement — the same win as the other side does not count.
Whether a Hard win also awards the Easy and Normal versions is not verified, so do not count on it.
This is worth combining: the same match can also satisfy Last Man Standing if you set three allied AI opponents, and a Construction-Yard-only victory condition keeps a 1v3 manageable. See the stacking plan at the top of this page.

Tempest Dynasty campaign on Hard. Whether beating a higher difficulty also awards the lower ones is not verified — we have not confirmed it either way, so do not assume Insane hands you Easy through Hard. If you want all four tiers and cannot confirm the stacking, the safe route is to play the lowest one first and check which unlocked before committing to a full replay.
Note Deprived asks for a campaign completed without spending Doctrine or Armory points — if you intend to get it, the Easy run is the one to do it on.

Either faction. A self-imposed restriction across an entire campaign, so decide before you start — you cannot un-spend points later. Either campaign counts.
Run it on the lowest difficulty. Playing a whole campaign without upgrades is hard enough without also fighting the difficulty setting, and no achievement here rewards doing both at once.
Faction: Tempest Dynasty. The Line Officer is a Tempest Dynasty specialist, so this is a Dynasty match. The catch is at once — you need 25 units inside the Inspire radius simultaneously, not 25 inspirations over time.
Mass a large ball of cheap infantry, walk the Line Officer into the middle of it, and trigger the ability there rather than mid-battle when the group has spread out.

Faction: GDF. Worth flagging because it is easy to assume otherwise: the Hijacker is a GDF specialist, not a Dynasty one. This is a GDF match.
Community guides note the Hijacker sits behind the full tech tree and is limited to one at a time, so this needs a long game — tech all the way up, then keep the single Hijacker alive through five Overrides.

GDF campaign on Insane. Whether beating a higher difficulty also awards the lower ones is not verified — we have not confirmed it either way, so do not assume Insane hands you Easy through Hard. If you want all four tiers and cannot confirm the stacking, the safe route is to play the lowest one first and check which unlocked before committing to a full replay.
Note Deprived asks for a campaign completed without spending Doctrine or Armory points — if you intend to get it, the Easy run is the one to do it on.
Faction: Tempest Dynasty. Technicians are Tempest Dynasty infantry, so this is Dynasty play. There is no single-match wording, so the 200 accumulates across games.
Technicians carry their own stock of mines, so a few of them laying continuously in a long match adds up quickly. It also sets up the opposite achievement — see I'm a mechanical man.
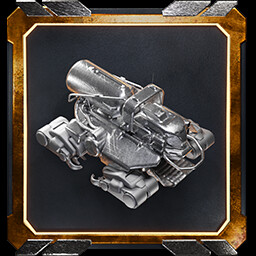
Faction: Tempest Dynasty. The Tempest Rig is the Dynasty's harvester, so this is a Dynasty match. Fifteen in one game is well beyond what you would build for economy alone, so this is a deliberate spam.
A long game on a rich map funds it comfortably, and the extra harvesting makes Plowing the Fields almost automatic in the same match.

Tempest Dynasty campaign on Insane. Whether beating a higher difficulty also awards the lower ones is not verified — we have not confirmed it either way, so do not assume Insane hands you Easy through Hard. If you want all four tiers and cannot confirm the stacking, the safe route is to play the lowest one first and check which unlocked before committing to a full replay.
Note Deprived asks for a campaign completed without spending Doctrine or Armory points — if you intend to get it, the Easy run is the one to do it on.

Faction: GDF. The Sniper is a GDF specialist, so this is GDF play. There is no single-match requirement, so the 100 accumulates.
Community guides note you can have up to three specialists in a match, which meaningfully speeds this up if you are willing to build several Snipers and cycle stealth on all of them.

Multiplayer against real opponents. Nothing here is skill-gated beyond winning, but it does need other players online, so the practical constraint is finding matches rather than the games themselves.
Community guides note that campaign and multiplayer progress are tracked separately for some achievements, so do not expect single-player work to count toward these.
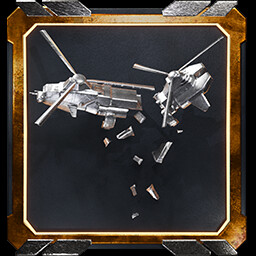
Either faction. Both factions are covered here: the Skycrane Carrier is the GDF's transport and the Dynasty flies the Hammerhand, so whichever side you play there is a loaded transport to destroy.
The transport has to actually contain units when it dies. Against an AI that rarely loads transports this is awkward, which is why community guides suggest arranging it with another player who will fly one out for you.
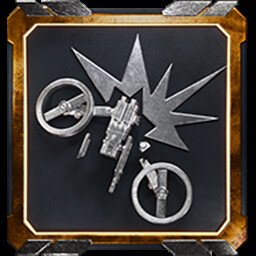
Another matchup-specific one. Combat Drones are GDF — the Drone Operator, Drone Mauler and Drone Control Unit all belong to them — so you need a GDF opponent producing them.
Missile Troopers are Dynasty infantry, so playing Dynasty against a GDF AI is the straightforward route. Worth knowing though: community guides report the GDF can also hire Missile Troopers from a Mercenary Camp, so a GDF-vs-GDF match is a second option if you prefer.

Faction: Tempest Dynasty. The Salvage line is Tempest Dynasty, so this is a Dynasty match. Twenty-five wrecks in one game means you want a busy battlefield rather than a clean win — let fights happen and collect afterwards.
Community guides note that aircraft can be salvaged too, including the GDF's drones, so a drone-heavy opponent is a good source.
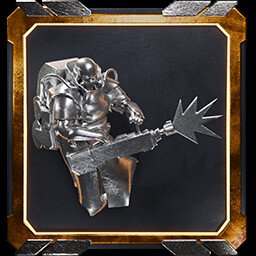
Faction: Tempest Dynasty. The Assault Gunner is Tempest Dynasty infantry, so this is Dynasty play. There is no single-match wording, so the 60 accumulates across games.
The kills have to come from the ability specifically, not from the unit's normal attack — use it on clustered infantry rather than saving it.

Faction: Tempest Dynasty. The Leveler is the Dynasty's aerial artillery, so this is a Dynasty match. Thirty uses in a single game means keeping it alive and out of anti-air range between barrages.
Build more than one if you can afford it — the count is uses, not uses-per-unit, so several Levelers barraging in rotation gets there far faster.

Either faction. Infantry only for the whole match, which has an awkward consequence community guides flag: it rules out the harvesting vehicles each faction depends on, so your economy is severely limited either way.
The workaround they recommend is a short, decisive game — a small map with a Construction-Yard-only victory condition, rushing capture infantry at the enemy MCV rather than trying to win a long economic match on foot.

Faction: Tempest Dynasty. The Tempest Sphere is a Dynasty vehicle, so this is Dynasty play. No single-match wording, so the 50 accumulates.
Use the ability on cooldown rather than saving it for the right moment — nothing here rewards using it well, only using it often.
Either faction. Cumulative, and community guides make one thing clear: the disarming has to be done by an engineering unit. Walking a unit onto a mine and losing it does not count.
Both campaigns include mine-clearing objectives you can replay, which is the usual route. If you play with a friend, one of you laying mines while the other disarms them also progresses Road paved with bad intentions at the same time.