
Double Dragon Gaiden: Rise Of The Dragons — Achievement Walkthrough
20 achievement guides · Full game page →
A lot of this list is single-run conditions that don’t conflict with each other, so you can earn several at once instead of replaying for each. Each plan below is one run. Achievements in a plan are marked with a ⛓ badge further down.
Start a run and play for chains rather than speed. Every time you sweep enemies into each other you build Crowd Control, and the three session-scoped counters all tick from the same behaviour, so one deliberately messy, drawn-out session covers all of them. Spend as little as possible at the shop so the tokens you pick up stay with you.
- ✓▢Crowd Pleaser — Perform more than 25 Crowd Control in a single session
- ✓▢Arcade Machine — Earn 10 tokens in a single session
- ✓▢I know Kung Fu — Perform more than 600 Special KO in a single session
Hottest Dog, Burger Time and Thanksgiving are one-off firsts rather than session-scoped, so they pop on the way to the 25 Crowd Controls without any extra effort. Eat'em Up (100 Crowd Controls) and Beat'em Up (3000 Special KOs) say ACROSS MULTIPLE SESSIONS in their own descriptions, so they are deliberately left out of this plan - they are lifetime totals that fill in on their own.
Royals, Okada, Triangle and Killers are four separate achievements that each say Mission 4, and Rise of the Dragons and Peace Enforcer are Ending A and Ending B. Plan four runs, take a different gang last each time, and steer two of those runs toward the two different endings so the endings cost you no extra playthroughs.
- ✓▢Royals — Defeat Royal in Mission 4
- ✓▢Okada — Defeat Okada in Mission 4
- ✓▢Triangle — Defeat Triangle in Mission 4
- ✓▢Killers — Defeat Killers in Mission 4
- ✓▢Rise of the Dragons — Achieve Ending A
- ✓▢Peace Enforcer — Achieve Ending B
This is a conflict rather than a true single-run stack, and it is the useful thing to know before you start. The Mission 4 boss is decided by which gang you leave for last, and the two endings are mutually exclusive - we have NOT verified that more than one Mission 4 boss can be fought in a single run, so assume they cannot be. The saving is in the overlap: four runs with an ending folded into two of them, instead of six.

Crowd Control is the game's assist/tag mechanic — chaining hits that pull in your partner character. The x3 tier just means landing the effect three times in a row; the on-screen counter tracks it. Fight in a group of enemies and keep the combo going. See the in-game tutorial prompt for the exact input if it doesn't trigger naturally.

Story unlock — finish any one of the four opening missions (you pick the order the four gangs are tackled). Just complete a full stage and beat its boss. Comes automatically as you start the game.

Same as the x3 version but one tier higher — keep the Crowd Control chain going to x4. Easiest in a crowded room where enemies keep the counter climbing. Naturally earned as you get comfortable with the tag combos.

The x5 tier of the Crowd Control chain. Pick a stage with dense enemy groups and keep the chain alive without dropping it. Fully upgraded characters and larger crowds make this simple; it usually pops during a normal run.
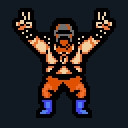
Cumulative within a single run/session — trigger Crowd Control 26+ times before the run ends. Lean into the mechanic on every fight rather than plain combos. Stages packed with mobs (and taking the longer mission routes) give you the most opportunities in one sitting.
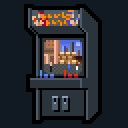
Tokens are the currency you bank from defeating enemies and clearing objectives, spent at the shop between stages. Ten in a single run is a low bar — just play through a couple of missions without needing to spend frugally. Killing more enemies and finishing missions builds the total quickly.
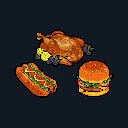
Lifetime counter — 100 Crowd Control triggers total, so it carries across runs. If you play the game normally and use the mechanic it accrues on its own over a handful of sessions. Stacks alongside Crowd Pleaser and Eat'em Up's bigger cousins.

Reach the end of a full run and get Ending A. The two endings branch on a late-game choice/outcome; Ending A is the path tied to defeating the final threat outright. Exact trigger for A vs B isn't spelled out in the description — if you land the other ending first, replay and make the opposite final decision. See a community guide if you need the precise branch condition.

The alternate ending to Rise of the Dragons. It resolves from the opposite late-game choice/outcome to Ending A, so a second run (or a different final decision) gets you both. The description doesn't state the exact condition — check a community guide for the specific branch if it doesn't trigger.

A Special KO is finishing an enemy with a special/finisher rather than a normal hit. 600+ in one run means favouring special-move kills throughout a long mission chain. Build tokens for characters and upgrades that lean on specials, take the longer routes for more enemies, and prioritise finishers over basic combos.
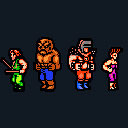
New playable fighters are recruited by spending tokens at the shop between missions (some appear as rescued/recruitable characters). Bank tokens and buy the characters when they're offered rather than only upgrades. Getting past six unlocked characters comes with steady progression.

Royal is one of the four gang leaders. You choose the order you clear the four gangs; Mission 4 is the finale where the bosses are confronted. Beat Royal there to earn this. Across a couple of runs you'll get all four leader kills (Royals, Okada, Triangle, Killers).

Okada is one of the four gang leaders confronted in the Mission 4 finale. Defeat Okada to earn this. If a single run doesn't cover every leader, replay and make sure to face Okada in the final mission.
Triangle is another of the four gang leaders faced in the Mission 4 finale. Beat Triangle there for the achievement. Rotate which leaders you defeat across runs to collect all four boss achievements.

Killers is the last of the four gang leaders confronted in Mission 4. Defeat them to complete the set of four boss achievements (with Royals, Okada and Triangle). All four come naturally if you finish multiple runs facing each leader.

Lifetime tally of special-move finishers — 3,000 total, so it carries across every run. Favour finishing enemies with specials rather than normal hits and it climbs over many sessions. Pairs with I know Kung Fu; both reward playing around special KOs.

Bank over 100 tokens at once instead of spending them. Skip a shop or two, rack up kills and objectives, and let the token count climb past 100 before you cash out. Easy to do on a run where you deliberately save.

Artworks are gallery unlocks bought with tokens (or awarded for progress). Spend surplus tokens in the gallery/shop on artwork over multiple runs until you pass 20. Purely a token sink — no skill involved, just play time and spending.

Like Connoisseur but for the music gallery — unlock 20+ soundtrack tracks, bought with tokens or earned through progress. Keep spending leftover tokens on the sound gallery across runs. It accrues naturally alongside the artwork unlocks.

Earn every other achievement in the game and this unlocks automatically. The gates are the two endings, all four Mission 4 leader kills, and the two big lifetime grinds (Beat'em Up's 3,000 Special KOs and the token/gallery unlocks). Clean everything else up and this is the last to pop.