
Dragon's Dogma 2 — Achievement Walkthrough
54 achievement guides · Full game page →
The opening of the game. You start in the mines and break out as part of the prologue - it is unmissable and unlocks on rails.
A story beat very early in the campaign, immediately after the prologue. Unmissable.
Vernworth is the first major city and the main-quest destination after you leave the starting region. Follow the main quest line and it unlocks on arrival.
Buy or find a Camping Kit, walk to a campsite marker out in the field, and rest. Camping is also how you heal lost max HP, so you will do it constantly anyway.
Oxcarts run scheduled routes between settlements. Talk to the driver at any oxcart stop and pay the fare. Note the cart can be ambushed en route, which is part of the appeal.
Once you reach Vernworth you can use the Vocation Guild to switch classes. Any switch counts, including switching and switching straight back.
Ferrystones teleport you to a Portcrystal. Use one from your inventory once you have activated at least one destination. They are expensive early, but the story hands you some.
When a pawn goes down you can lift and revive it. Let two of your three pawns fall in the same fight and stand between them - reviving one while the other is also downed satisfies the condition. Easiest to arrange deliberately in a fight you can survive alone.

The Rose Chateau Bordel is a landmark in Vernworth. Simply walking in through the front door is enough - you do not need to buy anything or complete its questline.
Property is sold in the cities once you have the gold. The cheapest option is the one to buy for the achievement - a house also gives you free rest and a storage chest, so it pays for itself.
At a Riftstone, use the option to set a quest for your main pawn. Other players who hire your pawn can then fulfil it. Setting it is all that is required - it does not need to be completed.

Part of the main quest line in Vernworth. The important word is 'in formal raiment' - you must be wearing the correct outfit when you attend, so make sure the masquerade attire is equipped before you enter rather than sitting in your inventory.
Crossing into the second major region is a main-quest milestone. The border gate requires the story to have opened it, so this arrives in sequence rather than by exploring early.
Pawn specializations are taught with Forgery Tomes or similar consumable items found and sold in the world. Use one on your main pawn from the pawn's inventory or the specialization menu.
Wakestones revive a dead NPC. You can either use one on an NPC who has died in the world, or assemble three Wakestone Shards into a full Wakestone and use it. NPCs in this game stay dead without one, so it is worth doing for a character you care about.
Vocation ranks come from Discipline Points earned in combat while that vocation is equipped. Stick with one vocation instead of switching constantly - the fastest route is to pick whichever class you enjoy fighting with and stay on it through the main quest.
Affinity rises from talking to an NPC, giving them gifts they like, and completing quests for them. Gifts are the fast lever - find an NPC who stays in one place, and repeatedly give them high-value or favoured items until their reaction changes.
Mystic Spearhand is one of the hybrid vocations, unlocked by finding the maister who teaches it rather than by levelling. You must be the Arisen (not a pawn) to use it. Once unlocked, equip it at any Vocation Guild.
Agamen Volcanic Island is the prologue area. Returning there later is possible once you have the means to travel back - it is not part of the critical path, so you have to choose to go.
A named dungeon, and the achievement name is advice: bring a lantern and spare flasks of oil. Reaching the location is all that is needed.

Find a hot spring out in the world and use it. Soaking also restores lost maximum health, so it doubles as a free full heal when you find one.
A landmark location reached through exploration and the main quest. Simply arriving is enough.
Another Arisen-only hybrid vocation unlocked by finding its maister out in the world. Equip it once at a Vocation Guild to trigger the achievement - you do not have to play it.
The third hybrid vocation, again unlocked by meeting the right maister. Trickster fights entirely through illusions and misdirection, which makes it a strange but memorable class to try once you have it.
A night-only field boss. The name is the constraint: it appears at night and you need to bring it down before daybreak. Travel at night deliberately, bring a lantern, and make sure your party is high enough level to burn it down quickly rather than chip at it.
Warfarer lets you carry any weapon and swap mid-fight, and it is the last vocation to unlock. It is gated behind finding its maister, which itself generally requires having made progress with the other vocations first.
You can grab onto a griffin and ride it as it takes off. The achievement asks for this twice - once is part of the main story, so the second one means deliberately finding another griffin, staggering it, grabbing on and holding while it flies.
Hidden achievement - Steam does not publish its description, so the exact trigger is not something we can verify from the schema. It is almost certainly tied to a late main-story beat or an ending, which means it is reached by playing the campaign through rather than by doing anything special. If you need the precise requirement, check a community guide rather than trusting a guess.
Dragonforging happens when a dragon-type enemy breathes fire on you while you carry the gear - the equipment comes out permanently upgraded. Fighting a drake and deliberately letting its breath attack connect is the way to trigger it, so take the hit rather than dodging every one.
Certain enemies snatch an item and run. Chase the thief down and kill it to get the item back. Some steal from your pack and flee the area entirely, so pursue immediately rather than finishing the rest of the fight first.
The true ending, and the description carries the warning that matters: it cannot be earned in Casual Mode. If you want this, do not play the run on Casual. It also sits past the apparent 'ending', so keep going after the credits look like they are coming.
Pawn badges are awarded to your main pawn based on how other players' parties rate it and what it does in the field. Setting a pawn quest and letting your pawn be hired is the normal route.
Hidden achievement - Steam does not publish its description, so the exact trigger is not something we can verify from the schema. It is almost certainly tied to a late main-story beat or an ending, which means it is reached by playing the campaign through rather than by doing anything special. If you need the precise requirement, check a community guide rather than trusting a guess.
When an NPC dies their body is moved to a morgue. Take a Wakestone there and use it on the body. This is the second, separate revive achievement alongside The Savior, so budget two Wakestones.
Hidden achievement - Steam does not publish its description, so the exact trigger is not something we can verify from the schema. It is almost certainly tied to a late main-story beat or an ending, which means it is reached by playing the campaign through rather than by doing anything special. If you need the precise requirement, check a community guide rather than trusting a guess.
Hidden achievement - Steam does not publish its description, so the exact trigger is not something we can verify from the schema. It is almost certainly tied to a late main-story beat or an ending, which means it is reached by playing the campaign through rather than by doing anything special. If you need the precise requirement, check a community guide rather than trusting a guess.
Hidden achievement - Steam does not publish its description, so the exact trigger is not something we can verify from the schema. It is almost certainly tied to a late main-story beat or an ending, which means it is reached by playing the campaign through rather than by doing anything special. If you need the precise requirement, check a community guide rather than trusting a guess.
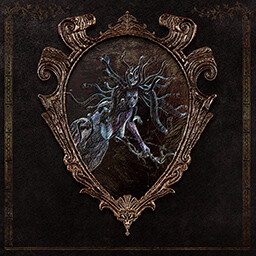
Medusa fights have a specific decapitation mechanic - you have to sever the head rather than simply defeating her. Slashing weapons aimed at the head are what you want, and climbing on is the reliable way to land them.
A long-running series of riddles from a single NPC. They are spread across the world and some have a limited window, so answer each as you receive it rather than banking them. Getting all of them right is what 'full marks' means - a wrong answer on one costs you the set. MISSABLE: the Sphinx accepts one answer per riddle and does not let you retry, so a single wrong answer costs you the set for that run. The first riddle asks where you found your earliest Seeker's Token, which you have to have paid attention to long before you meet her.
A major main-quest outcome. It requires seeing the Vernworth political storyline through to its conclusion rather than rushing past it.
Hidden achievement - Steam does not publish its description, so the exact trigger is not something we can verify from the schema. It is almost certainly tied to a late main-story beat or an ending, which means it is reached by playing the campaign through rather than by doing anything special. If you need the precise requirement, check a community guide rather than trusting a guess.
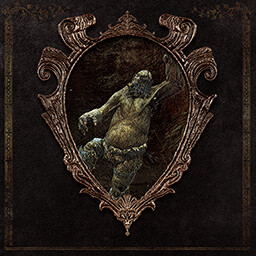
The joke is literal: a downed cyclops can be used as a bridge. Find a cyclops near a gap or ravine, bring it down so it falls across, and walk over the body.
Tied to a late main-story item of the same name as the game. It arrives in the closing stretch of the campaign.
A timed kill on the enormous Gigantus. Come back to the fight over-levelled with your strongest damage vocation and focus its weak point rather than fighting it fairly - the whole point is finishing much faster than the encounter expects. MISSABLE: the Gigantus stops being available once Main Quest 15, The Guardian Gigantus, resolves, so this has to be done before you finish that quest.
Use a Harpysnare Smoke Beacon to draw a harpy in, then grab it and hold on as it lifts off. This is also one of the game's traversal tricks for reaching otherwise unreachable ledges.
Cumulative exploration. Caves, mines, ruins and catacombs all count, and the world is dense with them - travelling on foot instead of using Ferrystones is what actually gets this done, because you find entrances by walking past them.
Seeker's Tokens are hidden collectibles scattered across the whole map, usually tucked behind or on top of something. 80 is well short of the full set, so you do not need a complete sweep, but you will need to explore widely and look up rather than only ahead.
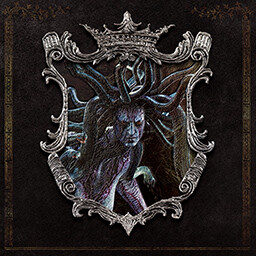
After decapitating a medusa, the severed head can be preserved rather than left to rot - it decays over time, so you need to have it treated quickly. The head is also a usable item that petrifies enemies, which makes this worth doing on its own merits.
Fifty separate NPCs raised in affinity. Gifts are the efficient route - carry a stock of well-liked items and hand them out to every named NPC you pass in the cities. Doing quests for people raises affinity too, so a completionist run accumulates a lot of this naturally.
Each vocation has a maister who teaches an advanced skill, and they are scattered across the world behind side content and specific conditions. This effectively requires engaging with every vocation, which is why it sits near the top of the difficulty range.
The phrasing points at a mass revival rather than a single one - bringing several dead back at the same time. That means stockpiling the means to do it and then using it at a moment when multiple people need it, rather than spending revives one at a time as deaths happen.
Two separate constraints stacked: every meat type, and each cooked under both day and night conditions. Keep a camp kit and a running checklist, and note that meat spoils in your pack - buy or harvest fresh and cook it promptly rather than hoarding.
Turn the medusa's own gimmick back on her. The preserved medusa head item petrifies what it is aimed at, so obtaining a head from one medusa and using it on another is the route. This is why Getting a Head is worth doing before you run out of medusa encounters.
Hidden achievement - Steam does not publish its description, so the exact trigger is not something we can verify from the schema. It is almost certainly tied to a late main-story beat or an ending, which means it is reached by playing the campaign through rather than by doing anything special. If you need the precise requirement, check a community guide rather than trusting a guess.