
A lot of this list is single-run conditions that don’t conflict with each other, so you can earn several at once instead of replaying for each. Each plan below is one run. Achievements in a plan are marked with a ⛓ badge further down.
Pick any official Survival map and hold out as long as you possibly can in a single round. The medal achievements are worded as on any map, so one strong round clears the whole ladder instead of three separate attempts.
- ✓▢GETTING STARTED — Earn a bronze medal on any official Survival map.
- ✓▢ON OUR WAY — Earn a silver medal on any official survival map.
- ✓▢THIS IS WHERE THE FUN BEGINS — Earn a gold medal on any official survival map.
- ✓▢SUPREME SURVIVALIST — Survive for 30 minutes on any official survival map.
NESTING: bronze, silver and gold all say on any official Survival map, so a gold-medal round awards all three at once - chase the biggest number and ignore the smaller ones. Surviving 30 minutes will comfortably be a gold round too. BEAT THE RUSH is deliberately NOT in this plan: a melee-only round is far harder to stretch out, so run it separately and settle for whatever medal you get.
Play The Last Stand campaign start to finish on Expert with Realism enabled, and take the detour for the hidden room while you are in there.
- ✓▢STILL STANDING — Survive The Last Stand campaign on any difficulty.
- ✓▢THE LAST FRONTIER — Survive The Last Stand campaign on Expert Realism.
- ✓▢HOUSEHOLD NAMES — Discover the hidden room in the Last Stand campaign
CONFLICT: THE LAST DASH wants the same campaign finished in under 13 minutes with nobody dying, and both the Expert Realism difficulty and the hidden-room detour cost you time. Treat the speedrun as a separate, easier-difficulty attempt - STILL STANDING only asks for any difficulty, so it is already banked by this run either way.
Play a full Scavenge game rather than a single round. You alternate sides, so the collecting achievement and the shut-out achievement can both land in the same match.
- ✓▢HUNTING PARTY — Win a game of Scavenge.
- ✓▢CACHE AND CARRY — Collect 15 gas cans in a single Scavenge round.
- ✓▢SCAVENGE HUNT — Stop the enemy team from collecting any gas cans during a Scavenge round.
CONFLICT: FUEL CRISIS needs overtime, and overtime only happens because the other team is still pouring a can - which is exactly what SCAVENGE HUNT asks you to prevent. Those two cannot share a round.
Both of these name The Sacrifice in their own descriptions, so one playthrough covers them. Get all three generators running simultaneously during the finale rather than restarting them one at a time.
- ✓▢SUPREME SACRIFICE — Complete "The Sacrifice".
- ✓▢CHAOS GENERATOR — Have all 3 generators running at once in "The Sacrifice" finale.
KILL BILL is left out on purpose. It is very likely earned here too, but its description does not name a campaign and we are not going to assert that from memory.
Gnome Chompski sits as a prize in the Dark Carnival midway (the carnival games area on the Tunnel of Love / Barns stretch). Grab him and you are locked into a pistol only for the rest of the run, because holding the gnome occupies your primary-weapon hand.
The practical way to do this is with a co-op team: your teammates carry the firepower and you carry the gnome, dropping him only to fight when you truly have to and picking him straight back up. Take him through the concert finale and into the rescue vehicle when it arrives.
Easiest on Easy difficulty with friends who know you are gnome-sitting. The gnome must be in your hands when the escape vehicle leaves.

Spitters telegraph their attack: they stop, rear back and there is a short wind-up before the acid lands. Kill her inside that window.
The reliable way is to keep a shotgun or a fast-firing weapon up whenever you hear the Spitter's distinctive gurgling call, and to shoot her the moment she comes into line of sight rather than waiting for a cleaner shot. Snipers work too if you spot her at range before she has closed the distance.
This will happen naturally over enough Versus/co-op play, so you rarely need to farm it.

When a Jockey lands on a teammate, both models are locked together and the Jockey rides on the Survivor's shoulders — an easy target from behind or the side.
Use a precise weapon (pistol, magnum, or a rifle) rather than a shotgun so you do not chunk your teammate. Shoot the moment the ride starts. Two seconds is short but generous enough if you were already looking that way, so stay near the back of the group where you can see pounces coming.

Ammo upgrade packs (incendiary ammo and explosive ammo) spawn in most campaigns from The Passing onwards. Pick one up, place it on the ground with the deploy key, then have a teammate walk up and take the upgrade from it.
Deploy it before a finale so the whole team refills — the achievement pops as soon as another Survivor actually draws ammo from your deployed pack.

Play Dead Center start to finish and escape in the stock car at the end of the mall finale. Any difficulty counts.
Finale note: the finale is a gauntlet-style event where you fill the car with gas cans, so keep one Survivor watching the car while the others run cans.

The Uncommon Infected are campaign-specific, so this is a checklist across the game rather than a single run:
- CEDA agents (hazmat suits) — Dead Center
- Mudmen — Swamp Fever
- Clowns — Dark Carnival
- Riot police (armoured from the front) — The Parish
- Construction workers (helmets, deaf to pipe bombs) — Hard Rain / Dead Center
- Fallen Survivor — The Passing
- Jimmy Gibbs Jr. — Dead Center finale
Play each campaign and make sure you personally get the kill on one of each.
You need to be actively reviving a Survivor while a Tank is close by. The safest way is to have the team kite the Tank at range while you pick up your downed teammate at the edge of its awareness, rather than reviving directly in front of it.
Adrenaline makes this far safer — it speeds up the revive dramatically, so pop one before you commit.

Bile bombs draw the horde onto whatever they splash. Throw one directly at a Tank and the common infected will swarm it, which also has the side benefit of buying your team a moment of breathing room.
Carry a bile bomb into any known Tank spawn (finales are the reliable place) and lob it as soon as the Tank appears.

Complete all of The Passing and escape at the end of the bridge finale. Any difficulty.

Complete Dark Carnival and escape after the concert finale. Any difficulty.

The chainsaw shreds commons instantly but has very limited fuel, so this is a cumulative grind across runs. Pick one up whenever you see it and use it into a horde — a single chainsaw held through one big horde event can easily bank 40-60 kills.
Hard Rain and any gauntlet/crescendo event with heavy horde pressure are the fastest places to rack up the count.

Any sharp melee weapon (machete, katana, fireaxe, cricket bat, and so on) decapitates commons on a clean hit. Blunt weapons like the baseball bat and guitar do NOT decapitate — they knock bodies away instead — so make sure you are holding a bladed weapon.
Carry a machete or katana as your default second slot and this piles up over normal play. Horde events and Hard Rain's rain-storm sections are the fastest sources.

Deploy an incendiary ammo pack, load up, then fire into a horde — every common you set alight counts. One large horde with a fully loaded assault rifle can get most of this in a single event.
Hard Rain and finales are ideal because the horde pressure is constant.

Complete Hard Rain — out to the sugar mill for gas, then back through the storm — and escape at the finale. Any difficulty.

Complete The Parish and escape across the bridge finale. Any difficulty.

Complete Swamp Fever and escape at the plantation-house finale. Any difficulty.

Play The Sacrifice from start to finish. In the finale a Survivor must go down to the generators to restart them so the rest of the team can escape — completing that finale finishes the campaign.

A checklist achievement — you need at least one common kill with each melee weapon type: baseball bat, cricket bat, crowbar, electric guitar, fireaxe, frying pan, katana, machete, tonfa (police baton), golf club, chainsaw, pitchfork, shovel, and the knife where available.
Some weapons are campaign/DLC restricted (the golf club, pitchfork and shovel appear in the later campaigns), so tick them off as you play through everything. A custom local game with cheats can be used to spawn the remaining ones if you want to finish the list quickly — but that route is not needed if you simply play all campaigns.

Versus only, and it needs the Survivor team to be bunched up. The best spots are chokepoints: ladders, elevator/lift rides, narrow safe-room doorways, and finale corners where all four are forced together.
Spit from above or around a corner so they do not scatter before the pool lands. All four have to take damage from the same patch.
A skeet: you must kill the Hunter while it is airborne, in the pounce. Keep a shotgun equipped, hold your crosshair at chest height, and fire as soon as it launches — do not track it all the way, lead where it is going.
The pounce must be lethal in the air; a Hunter you kill after it lands does not count. Versus is the most practical place to farm attempts because Hunters pounce constantly.

Mudmen are the Swamp Fever uncommon infected. They crawl at you low and fast, and much of the campaign is knee-deep water anyway — just make sure the ones you kill are actually in water, not on dry boards.
One run of Swamp Fever's swamp chapters gets this comfortably.
When the Tank rears back and hurls a chunk of concrete, the rock is a physical projectile you can destroy in flight. Watch for the throw animation, then put a burst into the rock as it comes toward you — a shotgun blast at close-mid range is the most forgiving, but any weapon works.
Back up as you shoot so you have more travel time to react. This takes practice; expect several Tank encounters before it lands.

Clowns are the Dark Carnival uncommon infected — their squeaky shoes attract common infected, which trail behind them in a conga line. Let a Clown build up a following (do not shoot him), then throw a Molotov onto the group once at least ten commons are in tow.
The midway and the coaster area are good places to let a Clown gather a crowd.

Complete Cold Stream on any difficulty and escape at the finale.

The Fallen Survivor is a rare uncommon infected in The Passing — a zombified survivor who runs away from you and drops loot (pills, molotovs, pipe bombs and so on) when killed. He does not spawn in every run.
Kill him whenever he appears and pick up what he drops. Ten pickups typically means several runs of The Passing, so treat it as a cumulative tally.

Twelve seconds is a long time to stay attached, so pick a Survivor who is isolated — someone lagging behind, or the last one on a ladder — and steer them AWAY from their team, not toward it. Teammates cannot shoot you off if you are around a corner or behind cover.
Versus is the natural place for this; ride the straggler and keep breaking line of sight.

CEDA agents (the hazmat-suited uncommon infected in Dead Center) drop a bile bomb when killed — but ONLY if you do not set them on fire, since fire destroys the vial. Kill them with bullets or melee and pick up the jar.
Each run of Dead Center yields a handful, so this takes a few passes. Do not throw the bile bombs before picking them up — the pickup is what counts.

In The Sacrifice finale one Survivor must go back down and restart the generator, and that Survivor dies. If you are playing as Bill and you are the one who makes that run, you get this.
In co-op you can simply choose Bill and volunteer for the generator run. (In the L4D1 version of the campaign the story fixes Bill in that role.)

You must land two separate rides without dying in between. After the first ride, break off before the team focuses you down — jump away, break line of sight, retreat, and come back for the second ride once they have moved on.
Going for a long, greedy first ride usually gets you killed, so ride briefly, escape, and re-engage.

Once a Charger slams a Survivor into the ground it keeps pounding them until it is killed or the Survivor is freed. Fifteen seconds means the Survivor's team has to be unable to reach you — so charge someone who is separated from the group, or charge them somewhere the team cannot easily follow.
Charging a straggler around a corner or off a ledge is the reliable setup.

Coordinate with your Spitter teammate: they lay a pool, you grab a Survivor and steer them into it. Jockey steering is loose, so grab a Survivor who is already close to the acid rather than trying to drive them a long distance.
The Survivor must take damage from the acid while you are riding them.

You need a tightly packed horde. The grenade launcher spawns in the later campaigns and in finales.
Best setup: trigger a big horde (an alarm car, a crescendo event, or a finale wave), back into a corridor so the commons funnel toward you in a column, wait until they are shoulder to shoulder, and fire straight down the line. Firing into a corner where they bunch up also works.

Foot lockers are the item caches added with the Cold Stream update — they take a moment to open and reward the team with supplies. Open five across your runs.
They appear in Mutations and in the campaigns that use the loot-cache system; open every one you walk past and this comes on its own.

The golf club is a sharp-class melee weapon, so it decapitates on a clean swing. Grab one (it appears in The Passing and later campaigns) and swing through a horde — 18 heads goes quickly during any horde event.
Complete The Last Stand on any difficulty. It is a short campaign built around the lighthouse finale.

No environmental damage: the Tank must die purely to Survivor gunfire and melee — no fire (Molotovs, incendiary ammo, burning gas cans), no exploding barrels or cars, no other scripted damage.
So: agree with your team to hold the fire, kite the Tank in a loop (whoever it targets runs, everyone else shoots its back) and gun it down. Easiest on a lower difficulty where the Tank has less health.
When a Smoker's tongue latches onto you there is a brief window before you are dragged. A swing from a sharp melee weapon (machete, katana, fireaxe, and so on) severs the tongue.
Keep a bladed melee in your second slot and swing immediately on hearing the tongue hit — do not wait to see where the Smoker is. Blunt weapons do not count for this.

Dark Carnival has jukeboxes (the concert/backstage areas are the obvious ones). Walk up and use it to play the Midnight Riders track.
Note it also summons a horde, so make sure the team is set before you press it.
Survival mode: pick any official Survival map, hit the start button, and survive long enough for bronze (the lowest of the three time thresholds).
Any difficulty. Barricade in a defensible corner with the team and you will clear bronze in the first attempt.

This is tied to players on a free promotional weekend — you must complete a campaign in a game that includes such a player. It is therefore only realistically obtainable during a Valve free-weekend event (or with a friend joining under those conditions).
Exact eligibility rules are set server-side by Valve; if you cannot see any free-weekend players, this one has to wait for a promotion.

Coordination achievement: your Smoker teammate grabs and starts choking a Survivor, and you drop acid on the pinned target.
Stay near your Smoker in Versus, watch the kill feed / pin notifications, and be in position to spit immediately. The Survivor is stationary while choked, which makes the spit trivial once you are in range.

Melee (the shove key) a Clown in the face and its nose honks. You do NOT have to kill it — shove ten Clowns and it pops.
Dark Carnival is full of them; shove every one you see rather than shooting them.

You need a long, clear runway. Look for corridors, bridges, rooftops and long straight streets, line up on a Survivor from maximum distance and charge THROUGH them — the carry distance is measured from the grab, so the more open ground behind them, the better.
Hitting a wall or a rail early ends the carry, so pick your angle before you charge.

The impound lot is packed with alarm cars. Walk, do not shoot near them, and above all do not use explosives or shoot through/at cars — shooting a car body triggers its alarm.
Use melee on commons in the lot, keep the whole team disciplined (one careless teammate's shot voids it), and pick a route around the parked cars rather than through them. Note that pipe bombs and Molotovs near cars will also set alarms off.

All the Tank's health must come off from melee. That means the team agrees to put the guns away and swing at it.
Do this on Easy with a full team, kite it in a wide circle, and take turns swinging at its back — the Tank one-shots you into an incapacitation on higher difficulties, so a single hit from it usually ends your attempt. Sharp weapons do the most damage per swing.

You must kill the Charger with a melee weapon during its charge animation. Stand off to the side of its lane as it comes past and swing — a high-damage sharp weapon (katana, fireaxe) makes the kill possible in the window.
If you meet it head on it will simply grab you, so sidestep first, then swing. Easiest on lower difficulties where the Charger has less health, and easiest if teammates have already chipped it down.

All four Survivors must be hit by a single charge. That means you need them in a line — the standard opportunity is a narrow corridor, a doorway, a ladder queue, or a finale corner where the team is stacked.
Charge along their axis, not across it. This is largely about waiting for the right formation rather than reflexes.
Boomer vomit arcs, so you can lob it blind over a wall, from a rooftop, or around a corner. The achievement wants you to hit a Survivor you cannot actually see.
Get above the team on a roof or balcony, step back so the wall/edge blocks your view, and arc the vomit onto them. Sound cues (their footsteps and chatter) tell you where to aim.

This was a holiday-event achievement: Special Infected dropped gift presents that Survivors could pick up. The drops were only active during the Valve holiday event period.
Outside that event this is not obtainable through normal play — trigger conditions were set by Valve server-side.
Same pattern as the Smoker version: wait for your Hunter teammate to pin someone, then acid the pinned Survivor.
Hang back near your Hunter in Versus and be ready to fire the moment a pounce connects — the pin does not last long on a coordinated team.

The sugar mill chapter is famous for spawning multiple Witches. You have to reach the safe room without killing any of them — avoiding, not fighting.
Turn OFF your flashlight where possible, walk (do not run) near them, never shoot toward them, and route around. Tell the team beforehand: one trigger-happy player voids it. Startling a Witch does not necessarily void the achievement — killing one does — but a startled Witch will usually kill someone, so avoidance is still the plan. Easy difficulty makes the run far calmer.

The M60 is a limited pickup weapon — it cannot be reloaded, and when it is empty you drop it. Hold the trigger down continuously and rack up 25 kills in that single burst.
Find an M60, wait for a horde (a crescendo event or a finale wave), then hold fire straight into the crowd. Do not tap-fire; the moment you release the trigger the run resets.

Win Gnome Chompski from the carnival midway game and carry him. This is the pickup half of the gnome content — see GNOME ALONE for taking him all the way to the rescue vehicle.
While holding the gnome you can only use your pistol, so bring friends.

Red explosive barrels/propane tanks sit around most maps. Wait until a Special Infected (Hunter, Smoker, Boomer, Charger, Jockey, Spitter) is next to one, then shoot the barrel.
Boomers are the easiest target because they shamble toward you slowly — let one waddle past a barrel and pop it.

In The Sacrifice finale you must restart generators; they can fail or be knocked out as the assault continues. The achievement wants all three running simultaneously.
Split the team so each generator has someone on it, start them close together in time, and defend so none goes down before the last one comes up.

The defibrillator occupies your health-kit slot and brings a fully DEAD Survivor back (not merely incapacitated). Each successful use counts once.
Carry a defib instead of a med kit whenever you see one, and be the one who runs to the body. Ten uses is a long cumulative tally, so make it a habit across campaigns; Versus and Expert runs give plenty of dead teammates to revive.

Scavenge mode: Survivors collect gas cans into a generator while the Infected team stops them. Win a match on either side.
Queue Scavenge and play it out — any official map.
A crowning with a blade. The Witch must die to sharp melee only, and no Survivor may go down or die in the process.
Most reliable route: Easy difficulty (lowest Witch health), a katana or fireaxe, and a Witch you sneak up on so she does not startle before you swing. Crouch-approach with the flashlight off, get behind her, and swing. Some players prefer the team shoot her down to near-death first, but the kill itself must come from the sharp melee weapon.

A shutout: the Survivor team must pour ZERO cans in the round you are the Infected team.
Play as coordinated Infected — Spitters on the generator, Smokers pulling can-carriers, Chargers bowling them over the moment they pick a can up. Shooting the can they are carrying makes them drop it. Pub games make this hard; a team of friends against a weak lobby is the practical route.
Survive longer than the silver time threshold on any one official Survival map. Pick a map with a strong chokepoint, stack the team into it, and hold. Molotovs and pipe bombs bought you the extra minutes here.
Your Charger pins a Survivor and pummels them; you drop acid on the pinned target.
Charger pins last a while, so this is one of the easier coordination spits — stay close to your Charger in Versus and fire as soon as the slam lands.

Dark Carnival's Stache Whacker carnival game: hit the pop-up Moustachio heads faster than the machine demands. It gets quicker as it goes.
Stand centred, swing with melee (not gunfire), and watch the whole board rather than chasing one head. Beating it triggers a horde, so have the team ready.

The high-striker carnival game in Dark Carnival: melee the target hard enough to ring the bell. Swing with a melee weapon rather than shoving.
Like the other carnival games, ringing the bell attracts a horde — be set before you do it.

A speed run of the final bridge. The clock starts when the finale begins and stops when the last Survivor boards the chopper.
Run, do not fight: sprint the bridge, ignore commons, use pipe bombs to pull the horde behind you, and use adrenaline (it makes you faster). The Tanks that spawn on the bridge should be run past, not killed. Easy difficulty and a team briefed to sprint makes this very doable.

The crescendo event at the crashed plane in Dead Air — you must take zero damage across the whole event.
Get a high or enclosed position where commons can only reach you from one direction, keep a shotgun for anything that closes, and let teammates handle Specials. Even chip damage from a single common voids it, so being nudged is fine but being hit is not. Easy difficulty and a corner with a single approach are the practical answer.

Fifteen cans by YOU in one round. Most Scavenge rounds do not have that many cans available unless the round runs long — overtime keeps extending the round as long as cans keep being poured.
So: play with a team that lets you be the designated runner, keep the round alive through overtime by pouring steadily, and take every can yourself.

Adrenaline speeds up revives significantly. Pop a shot of adrenaline, then pick teammates up — each revive done while the effect is active counts.
Because the effect is short, the efficient play is to save adrenaline for moments when two or more teammates are down and revive them back to back. Ten total is a cumulative tally across runs.
An instant kill means driving a Survivor off a lethal drop — charge them off a ledge, a rooftop, a bridge, or into water/void where the fall itself kills them.
So the achievement is really about map knowledge: learn which edges in each Versus map are fatal, then wait for a Survivor to walk near one and charge them over it.

Queue a Versus match on Dead Air and see it through both halves without leaving. Disconnects and quits void it, so play it out.
Gold demands a long survival time on a single Survival map. You will need a team, a strong chokepoint and disciplined resource use — Molotovs to burn approach lanes, pipe bombs to break Tank pressure, and someone always watching your back.
Pick the map your team knows best and repeat it; the timer resets each attempt, so it is about a single clean run.
A Dead Center speed section: leave the atrium before the scripted Tank shows up.
Run straight through — do not stop to loot, do not fight commons, use the direct route to the exit. Briefing the team to sprint is most of the achievement. Easy difficulty gives you a calmer run.

No firearms at all for the whole campaign — melee only. Your pistol counts as a firearm, so you must not use it either; take a melee weapon in the primary slot and leave the guns alone.
Do this on Easy with a team all doing it together. The dangerous parts are Tanks (kite and swing) and Witches (avoid). Sharp weapons — katana, fireaxe, machete — are the strongest.

Mutations are the rotating alternate game modes in the Mutations menu. You need to play six DIFFERENT ones.
Available Mutations rotate, so this may take a few visits over time — check the Mutations list, play whatever is up, and come back when the rotation changes.
Rescue closets hold dead Survivors who respawn when freed. Normally you free them one at a time — the achievement wants three coming out of the same closet.
That means letting three teammates die before you reach the closet, which realistically happens on a rough Expert run (or you can arrange it deliberately with friends in a private lobby).

Overtime is the extension period at the end of a Scavenge round while a Survivor is still carrying/pouring. During overtime, stop a can-carrier — shooting them as an Infected, pinning them, or hitting them with a Charger all make the can drop.
Spitter acid and Charger slams are the most reliable disruptors.
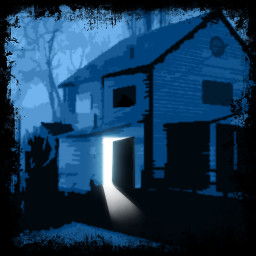
The Last Stand update added a hidden/secret area as an easter egg to find during the campaign.
Exact location is not one I can verify from the achievement text alone — see a community guide or the in-game exploration route rather than trusting a guess. Explore off the main path (side buildings and the areas around the lighthouse route) and look for an entrance you have to interact with.

Expert Realism removes the glowing Survivor silhouettes, disables respawn closets in the usual way, and makes friendly fire punishing — on top of Expert damage.
Requirements for the run: a coordinated team on voice, everyone on shotguns or a controlled AR (friendly fire is brutal — do not spray), and total Witch avoidance. Move slowly, clear methodically, and never leave a teammate alone. Pick a short, forgiving campaign for your first clear.
A pure lifetime grind — tens of thousands of kills. There is no shortcut in normal play; it accrues over hundreds of hours.
If you want to speed it up, horde-heavy modes and long Survival sessions produce the most kills per minute. Otherwise just play and it will land eventually.

The long haul: an Expert clear of every official campaign. Each campaign only needs to be completed once on Expert (across separate sessions is fine).
Expert rules of thumb: friendly fire is severe so pick your lanes, never rush ahead, always keep the team within revive distance, avoid every Witch, and keep pipe bombs for the Tank+horde overlaps. A regular four-player team on voice makes the difference.

Like the holiday variant, this requires players who joined during a Valve free-weekend promotion in your game, and completing a campaign with them.
Only realistically obtainable while such a promotion is running.
In the Dark Carnival concert finale you must stay ON the stage for the entire finale — no running out into the arena to grab pickups or kite.
Stock up before you start it, put the team in the corners of the stage, and hold. Tanks are the danger since you cannot kite them far — save Molotovs and pipe bombs for them. Easy difficulty makes staying put realistic.

A cumulative tally across all your Scavenge play — roughly a handful of full matches if you are consistently the runner.
Volunteer to be the one grabbing cans every round and this comes steadily.

Any medal (bronze counts) on any official Survival map with melee weapons only — no guns at all.
Pick a map with a tight chokepoint so the commons come to you single-file, take a sharp weapon, and swing. Have a teammate cover Specials if you can — otherwise, expect this to take a few attempts. Easy difficulty is the fastest route to the bronze time.

Cumulative across your Scavenge rounds as Infected. Any hit that makes a carrier drop their can counts — a Charger slam, a Smoker pull, a Jockey ride, a Boomer vomit that panics them, or simply shooting/hitting the carrier.
Spitter and Charger are the most consistent can-droppers. Focus the carrier every round rather than chasing kills.

You must be inside the safe room at the end of a round with a defibrillator, and then go back OUT to revive a dead Survivor before the round closes.
So: carry a defib rather than a med kit, and when the team makes the safe room with a body left behind, step back out and use it.

This is the Steam Group / formed-team feature — you must play as a formed team (not a random pub side) and win a 4v4 Versus or Scavenge match.
Get four friends, form the team through the in-game team menu, and win a match.

The wedding area is a Versus-map set piece with rows of chairs. As the Charger, grab a Survivor and drive them lengthwise THROUGH the rows so the chairs shatter.
Line up along the aisles rather than across them, and pick up as much run-up as the space allows so you plough through the maximum number of chairs.

Simply play five complete Scavenge matches on The Port map. Leaving early does not count, so see each one through.

The Sacrifice finale requires a Survivor to make a suicide run to the generator. As Infected, pin/incapacitate that Survivor mid-run.
Watch for the Survivor who breaks off and heads down alone — a Charger, Hunter, Smoker or Jockey on them at that moment gets it. Position ahead of the route rather than chasing.
Pounce damage scales with the height and distance you fall from — a maximum-damage pounce needs a long drop onto the target.
So: climb. Get onto rooftops, gantries, cranes and high ledges, wait for a Survivor to pass below and away from cover, and pounce down on them from as far up as you can. Learn each Versus map's high spots; that map knowledge is the whole achievement.
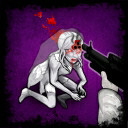
The Witch bride is the wedding-area Witch (The Passing). On Expert you must one-shot her with a shotgun — a crown.
To crown: approach quietly (flashlight off, walking), get right up close to her while she is still seated/sitting, aim at her head and fire the full blast point-blank before she stands. A pump/auto shotgun at contact range is the standard tool. If she stands up, the blast will not do enough and you have lost the attempt.
Thirty minutes is a long hold and needs a real team plan: a chokepoint the commons must funnel into, rotating who reloads, Molotovs to hold a lane, pipe bombs for Tank waves, and someone reviving fast.
Ammo and health management is what ends most runs — do not waste a med kit early. Pick the map your team is most comfortable defending and repeat.
Both weapons are melee pickups from the later campaigns. Keep one equipped and make a point of meleeing Jockeys rather than shooting them.
Versus (where Jockeys spawn constantly) is far faster than co-op for this. Twenty is cumulative across matches.
A speed run with a no-death clause. Everyone must survive AND you must beat the clock, so a wipe-and-retry mentality is required.
Practical approach: Easy difficulty, everyone sprints the route, ignore all optional fighting, use adrenaline for speed, and skip loot beyond what you need. Learn the fastest route in a practice run first, then do the timed attempt. Any death voids it, so an incapped teammate must be picked up immediately.
The hardest ruleset (Expert plus Realism) on The Last Stand.
Same rules as THE REAL DEAL: friendly fire is punishing so keep firing lanes clear, no silhouettes means constant voice callouts, avoid every Witch, and hold together. The lighthouse finale is the crunch point — bring a full loadout into it and use throwables to break Tank waves.
A hidden-object easter egg: golden crowbar melee weapons tucked away in the L4D1 Survival maps added to L4D2.
I cannot verify the exact hiding spots from the achievement text, so rather than guessing: check a community guide with screenshots for each map's spot, then pick the crowbar up. Use a private Survival lobby so you can explore without horde pressure.
Spitter acid destroys gas cans on the ground. In Scavenge, spit onto the cans themselves (including the cluster at spawn and any a Survivor drops) rather than onto Survivors.
Twenty is cumulative — make destroying cans your priority every round you spawn as Spitter.
Versus Survival: you must hold out for ten minutes while a human Infected team hunts you (rather than only the AI director).
Chokepoints matter even more here, since human Specials will coordinate. Keep the team tight, save throwables for Tank spawns, and expect a few attempts.
A checklist: bronze on each official Survival map. Bronze is the shortest of the three times, so each individual map is manageable — it is the coverage that takes time.
Work through the map list one at a time; a chokepoint plan on each is all you need.
Silver on every official Survival map — a longer hold on each than bronze required.
By this point you want a regular team, per-map chokepoints, and disciplined throwable use. Do them one map per session rather than trying to grind through in one sitting.
The full Survival completion: gold on every official map. This is one of the game's biggest time investments.
It needs a coordinated four-player team with a rehearsed hold on each map — knowing the exact corner, who watches which lane, and when to spend Molotovs. Expect to repeat individual maps a lot.